Home Blog Page 6

How To Do Chest Exercises

0

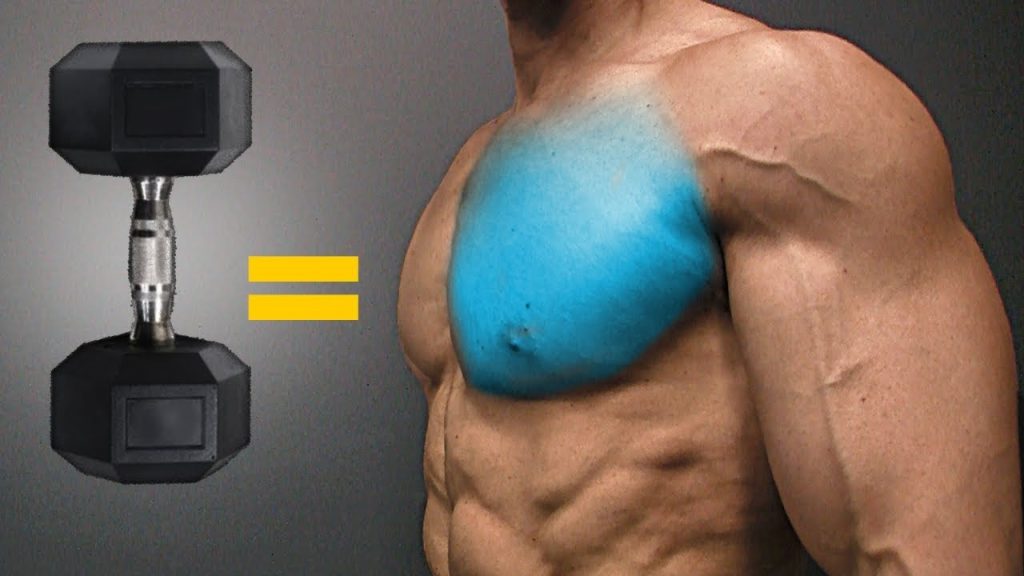
Doing chest exercises is something that many men and women are interested in. Almost all men like to show off a defined and muscular torso and almost all women want to enhance their chest and present an elegant posture. When it comes to chest exercises, women often make a basic mistake: avoiding weights. Weights are one of our best allies to enhance this area.
How To Do Chest Exercises

Traditionally, women have avoided these types of exercises, fearing that lifting weights will overdevelop their muscles. This is a fairly common mistake. The most important issue lies in the pounds lifted during training. If the chest exercises that we discuss below are performed with very heavy weights, let’s say for example about twenty kilos, that moment of muscle development that some women fear will be reached.

On the other hand, using a moderate load, between two and five kilos in each hand, muscle growth will not take place, only the toning of the muscles involved in these exercises will occur: arms and pectorals. For this reason, whether you are a man or a woman, if you are interested in doing chest exercises you can do the ones we propose in our article, adapting them to your needs and desires. If you want more muscle mass, you should do it with a lot of weight, while if the only thing you are looking for is to tone your muscles, you should use little weight.

What you should not do is not use weight of any kind, as then the exercises will not do their job. If the exercises are too hard for you at first, you can do them without any weight for several weeks, but as soon as you get more strength and endurance you should add weight little by little. If you want to know more about how to do chest exercises, pay close attention to the following proposal.

What do you need to do chest exercises?

  •  Comfortable sportswear
  •  Weights

Instructions for Doing Chest Exercises

  1. There are many specific exercises for chest. Here are some of the most common ones. You should try to perform sets of these exercises during your training sessions. The first few days do few repetitions and increase them as you get better at your practice.
  2. Lying on your back with your back completely straight, you must hold the weights or dumbbells on your chest with your arms bent, as you can see in the image, raise the weights little by little towards the ceiling until your arms are completely straight forming an angle of ninety degrees with respect to the position of your body. Perform the movements gently and slowly. 
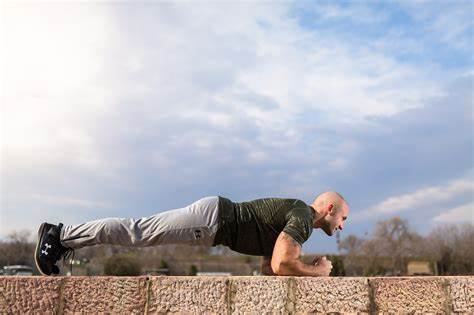
  3. Push-ups, planks, planks, push-ups, … The names of this exercise are many and without a doubt all of them are hated equally, especially by women who tend to have more problems when it comes to performing them. However, the benefits of this exercise are innumerable as they help us tone arms, pectorals and abs.
  4. With your legs shoulder-width apart, perform a squat. We have to be very careful that our knees don’t get in front of our feet. Grab the weight with both hands and try to lift it toward the ceiling. When you do, stretch your legs and your entire body. When the weight drops, return to the previous squat pose. This exercise is excellent for toning the pectorals and also the legs and buttocks. 
  5. The last chest exercise we recommend is very similar to the previous one. However, now when you lift the weight you should not try to lift it towards the ceiling, you should only lift it until your arms form a ninety degree angle. When you get into that pose, you should try to hold it for several seconds. 

Tips for Doing Chest Exercises

  • Take it easy and don’t expect to see results right away. Exercise and sport offer very good benefits, but it takes a while for them to start to be noticed.
  • You can combine these exercises with abdominal exercises that will help you strengthen your entire upper body.
  • Stay motivated. The first few weeks you will have a hard time performing these exercises as your muscles are not used to making these efforts. Surely during the first days of training you will suffer from muscle soreness and pain. Think that these first moments of training are the hardest, as soon as you manage to overcome them everything will be much easier.

How To Do Abdominal Exercises

0

Having well-defined abs is something that every person would love to have. In fact, the part of the abdomen, better known to all of us as “the belly”, is a place in the body where a lot of fat accumulates very quickly. Even if you’ve been fit for a long time, the abs are a muscle that loses mass incredibly quickly. In the same way, in this long-suffering place, all the fat and calories caused by a sedentary life and by the overeating and drinks accumulated in this long-suffering place.

How To Do Abdominal Exercises

For all these reasons, it is essential and highly recommended to do effective, correct exercises and, above all, with a constant periodicity if you want to have defined and toned abs. In this case, it is not enough exclusively to do physical exercise at a general level, but this global training must be accompanied by specific and focused exercises. In this sense, many people perform numerous abdominal exercises with a lot of will but with little precision and correction. By doing this ab workout incorrectly, you can, in addition to wasting time, damage your back. For all these reasons, today in doncomos.com we explain in detail how to do abdominal exercises in a very effective and correct way, so that you notice the results in just a few workouts.

Instructions for Doing Abdominal Exercises

  1. First of all, you should keep in mind that to do your abdominal exercises it is highly recommended that you start with a warm-up of about 15 minutes and some brief stretches. So, you can run at a steady pace and not too fast for about 10-15 minutes and then stretch your arms, legs and abdomen with four basic stretching exercises – on the floor or standing. In the same way, it is also very important to dress in comfortable clothes; It is not recommended to wear clothes that are too tight or to wear rubber bands or seams.
  2. Once you understand all of this, you can start your ab exercises. To do this, we present you with a basic abs routine to start training this muscle easily and without damaging other parts of the body. So, the first thing you should do is place a mat – failing that, a towel or a thin mat – to be able to lie down on the floor comfortably.
  3. Then, you can stretch on the floor on your back and with your body completely straight. So, take three full breaths and you can start with the first exercise; Place both arms on your shoulders crossed, that is, forming a cross on your chest – right hand resting on your left shoulder and vice versa.
  4. In this position you should bend your legs, raising your knees up and you can start your set; you should raise your head while raising your leg one at a time alternatingly. Therefore, you should raise your head with the strength of your abdomen at the same time as you raise your leg.
  5. Keep in mind that the head must rise due to the force that reaches it from the abdomen; Under no circumstances should you force your cervical spine, as this would damage them. It can also be helpful to look up at the ceiling as you climb, as this will relax your neck and neck. In addition, you must control your breathing to do the exercise more correctly; Release the air when you’re up.
  6. Another very useful type of exercise to start training your abs is the following: place your arms on the back of your neck, raise your head by squeezing your abdomen and while bringing your right hand closer to your right foot and, then, your left hand to your left foot, then lower and rest. The exercise consists of repeating this movement of going up, touching the right heel with the right hand, touching the left heel with the left hand, and going down.
  7. One more exercise that can be simple and effective is the following: in this case, continue lying on your back, but this time with your whole body flat. Place your arms on the floor, parallel to the straight trunk of your body. Thus, you should lift both legs straight and bring them alternately closer to your chest, that is, as if you were walking on the ground. In this exercise you have to be especially careful not to bend your back or lift your belly, all this you will achieve by making force with your abdomen down.
  8. The last exercise we propose is totally different. In this sense, you should now sit on the floor with your hoods bent; The idea is to drop your back backwards with your arms straight and hold for several seconds. Keep in mind that in this case it is especially important that you keep your back straight with your head and that you force your abdomen well.
  9. All of them are simple exercises and ideal to start your ab workout. You can perform 4 sets of 10 repetitions each – rest a few seconds between sets – of each exercise. So, increase the repetitions as you increase your fitness.

What do you need to do abdominal exercises?

  •  Comfortable clothes for sports.
  •  A mat – a thin mat or towel is recommended.
  •  Constancy.
  •  Patience.
  •  Motivation.
  •  Time.
  •  Music -optional-.

Tips for Doing Abdominal Exercises

  • Keep in mind that breathing is very important when it comes to exercising without harming your body; Therefore, try to control it and do complete breathing cycles.
  • It is very important that you gradually increase the power and pace of your workouts and exercises, otherwise you could injure yourself or cause damage. Thus, constant training is what leads to improvements and good results.

How To Do a Routine for Abs

0

To do any exercise, having a good routine is essential. And it is that a progression and consistency must be marked so that the results are efficient and the exercise we do is healthy. Thus, depending on which part of the body you want to work, you will do some scheduled and marked exercises or others. Along these lines, it is essential to know your needs and your physical condition, as well as what you want to exercise.

How To Do A Routine For Abs

In this case, if your intention is to mark your abs and work on them, you should also do a good routine. Keep in mind that the abs is a muscle that is very difficult to define, which is why you must do a specific but at the same time constant work adapted to you. Therefore, you should adapt a routine and increase the intensity and exercises as the workouts go on.

Instructions for doing an abs routine

  1. First of all, you must keep in mind that to tone, strengthen and mark your abdominal muscles, you must also do work and exercise your whole body as a whole. By exercising in general – running, swimming, walking, cycling, fitness, etc. – you activate anabolic hormones, which is why by doing specialized exercises focused on the abdomen you will gain greater benefits, greater toning.
  2. In line with the above, we recommend that you include in your training routine, about 10-15 minutes for running, swimming, walking at a fast pace, etc. Any sport can be, the idea is to activate your body, perform a previous and gentle warm-up. Next, it is also advisable to do about 5 minutes of stretching -before and after your abs-, so you will avoid injuries and damage and, in addition, you will have less soreness the next day.
  3. Another essential point to perform your abs routine is the fact that you should not train every day. The most advisable thing, if you are not in shape, is to do 2-3 workouts a week – about 45 minutes between warm-ups, exercises and stretches – on skipped days. In other words, you should always rest the day after training.
  4. As there are numerous exercises, we recommend that you do a couple or three of routines, mixing the intensity; This way, you can work a few more days to the limit and other maintenance exercises. In this sense, you should choose those abdominal exercises that best suit your physical shape and condition.
  5. In your abs routine, you should capture the rest time between repetitions and, in the same way, between exercises. Thus, we advise you to start with 3 sets of 10 repetitions for each exercise and, as the workouts go on, increase the number of repetitions. So, at the beginning you should do about 20 minutes of warm-up and stretching – a lot of aerobic exercise to burn fat – and about 20 minutes of sit-ups. So, as you get fit, you can increase the time focused on your abs.
  6. As already said, there are abdominal exercises in which you must raise your legs on your back, others in which you must raise your head to touch your knees, other exercises in which you must stay on top in the form of a plank, other exercises in which you must be in a lateral posture and raise your legs and arms, etc. Therefore, try to combine the different modalities and adapt the power and hardness to your condition. The idea is to progress, because if one day you overdo it and then you go 2 weeks without doing any exercise, it won’t do you any good.
  7. Keep in mind that in abdominal exercises you can damage your back, your neck, your lower back; Therefore, try to do the exercises chosen well, complete and relatively slow. You should always have your back – when you are on your back – well glued to the floor and you can only achieve that if you keep your abdomen tense.
  8. In your ab workout routine, the ultimate goal is to work this part of your body; Therefore, you should basically do strength with these muscles in all your exercises. Keep this in mind whenever you do abdominal exercises. Finally, we also recommend that you start the routine at a gentle level and increase the load and power of the exercises as the minutes go by; Your routine should go from less to more, always ending with gentle exercises again.

What do you need to do an abs routine?

Tips for Doing an Abs Routine

  • These two articles will surely be of interest to you.
    How to Get Perfect Abs How
    To Do Hypopressive Abs
  • No matter how much you diet, if you don’t complement your exercises and sports routine with a good diet, you have nothing to do; Thus, you should eat a varied and balanced diet, while drinking enough water – about 2 liters a day. Similarly, getting a good night’s sleep and rest at the right times is absolutely imperative as well.
  • Keep in mind that each person is different, so adapting the routine to your needs and physical condition is very important. Choose the exercises that best suit you and, if necessary, go to a specialist for guidance and help.

How To Deadlift

0

Deadlifting is essential if you want to one day achieve a great physique in the gym. However, it is an exercise that is not usually done very often due to how difficult it is to get a correct technique.

How To Deadlift

The deadlift is one of the 4 basic multi-joint exercises that exist in bodybuilding (the others are bench press, military press, and squats). It is an exercise that consists of lifting a weight that is usually very heavy by grabbing it with the arms and lifting it up to the abdomen by propelling ourselves with our legs. Said like this, it seems easy, but it is very common to see a lot of mistakes that can injure you.

You may also be interested in: How to Lift More Weight in the Gym

A poorly performed deadlift can lead to everything from back injuries, to shoulder injuries, to leg and wrist injuries. In addition, being an exercise where a lot of weight is put in and few repetitions, there is much more risk of injury than in other exercises.

On the other hand, a well-performed deadlift strengthens virtually every muscle in the body, especially the back, forearms, and back of the leg. It will also help you secrete a lot of growth hormone, which you already know is key in muscle gain.

From doncomos.com you will learn how to perform a perfect deadlift, so that you can get the most out of it and avoid injury.

What do you need to deadlift?

  •  A bar and some discs.
  •  Patience.

Instructions for Deadlifting

  1. How to proceed:
    Before we talk about the deadlift technique, let’s see how we are going to orient it for training. I recommend doing deadlifts only every 15 days because of how exhausting it is, I recommend doing it the day you train your back, since on leg day you already have the squat as a big exercise and on chest and shoulder day the military press and bench press. We are going to do 2 sets of warm-ups with light weight and many repetitions to prepare the body to perform the exercise. Then we are going to do 3 sets of work, two of them approximation, increasing the weight progressively until a final set with a lot of weight and few repetitions (from 1 to 5). We will have to make strength progressions and set ourselves to exceed a deadlift strength goal, since the more force the more muscle.

  2. Phase 1: The grip:
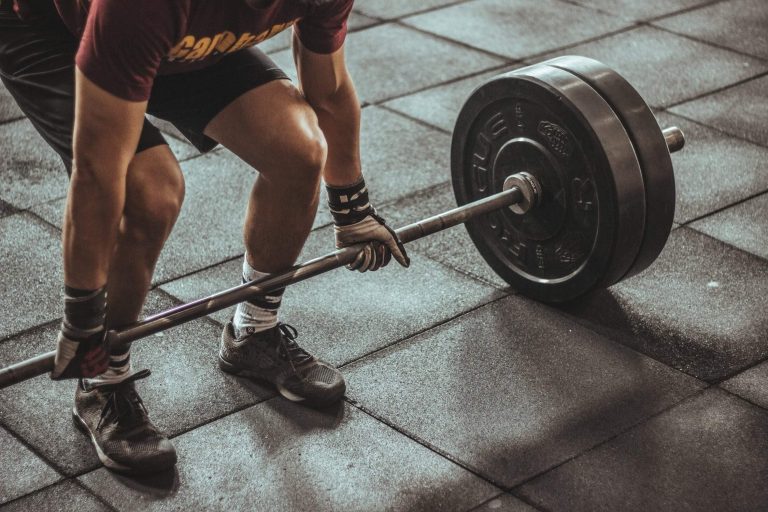
    As we can see in the photo below, you have to bend down bending your knees to grip the bar with both hands. The back is not hunched and we are very close to the bar, with the toes under it. The grip should be shoulder-width apart and in lifts with a lot of weight, we can use a mixed grip (one hand with a pronated grip and the other with a supinated grip), but as a general rule we will use the pronation grip. We must also lower the butt as much as we can since we are going to pry it off.

  3. Phase 2: Raise:
    Now we must pull upwards with all our strength, making force with the legs and abdomen to raise the bar. We will keep the bar close to us so as not to lose power, the back should never arch and the arms really only hold the bar (the force is really done with the leg), but they must hold tight to prevent it from falling to the ground. Once we get on top, we fit the bar into the abdomen and we will have finished the movement.

  4. Phase 3: Lower:
    We start from the position of the image, now our goal is to lower the bar back to the bottom, to perform a new repetition. You should lean forward a little without arching your back and at the same time bend down using your legs to the floor in order to place the bar on the floor. If you are going to do more than one repetition, as soon as you touch the bar to the floor, without letting go, go back to phase 1 and repeat all the phases of the exercise.

Tips for Deadlifting

  • Patience: There are people who despair because even if they manage to put a lot of loads on the deadlift, they don’t achieve a perfect technique. You see them arching their backs, they don’t get the bar in well, they don’t go down well… That’s because you’re putting on too much weight, which even if you get benefits from it, you could get injured. To do this, it is better to be a person with patience and move only the weights that you are able to move with perfect technique, which you will polish little by little.
  • Trap on Lowering: If your gym owner allows it and you only go for one rep, you can afford a little trap that will prevent you from lowering the bar to the floor. When you come all the way up in the deadlift, instead of lowering the bar to the floor, release it and drop the barbell. You just need to be careful with your feet and not breaking the gym floor, which is common when you’re handling heavy loads.

How To Clock Abs

0

The abs are a part of our body that is very difficult to work on. And even if you do constant and frequent physical exercise, the abs are a muscle that is quite difficult to strengthen and, above all, to mark. In this sense, by exercising in a general way – running, walking, cycling, etc. – our abdomen eliminates fat and remains more or less flat. However, to set perfect abs, you need to go further; Specific exercises must be done to define and mark this part of the body. Thus, there are numerous routines that if you do them consistently and often and accompany it with a good diet, your abs will be marked in a matter of days. To do this, you must promote a balanced diet low in saturated fats while exercising daily – running, swimming, cycling – and complement it with a good specific routine to work these abs. All in all, it will be possible that in a few days your abdomen will begin to change: it will be defined and the tablet will be marked. To make it possible, today in doncomos.com we explain how to mark abs.

How To Clock Abs

Instructions for marking abs

  1. To have isometric and well-defined abs, you should first stretch and warm up for a few minutes. We recommend running for about 15-20 minutes. If you start warming up your body before doing crunches purely, the result will be better, as you will have prepared your body and stimulated the elimination of fat. Similarly, it is highly recommended to perform some stretching exercise to avoid injury and/or damage during the exercises.
  2. Then, you can start your workout routine to get your abs right. To do this, condition a space by setting things aside so that you can lie on the floor with enough space; In the same way, put a mat or a thin mat, so you will be much more comfortable.
  3. Start by lying on the floor face down in a plank shape. You should stay straight and increase your body weight by resting only on the balls of your feet and elbows; The goal is to keep the abdomen strong so that the weight falls mainly on this muscle. The first exercise will consist of squeezing your abs and keeping your pelvis contracted; You should stand still for 40 seconds, with your body weight on your abdomen. Breathe in and inhale constantly, and after a few seconds, rest by stretching. Thus, you should repeat the exercise in a series of 3 times, 40 seconds each, with the rest -between 5-10 seconds-.
  4. The next exercise will be similar; You should do exactly the same but with your body resting on the tips of your feet and hands, that is, you should have your body higher and your arms stretched out. In this case, your arms and feet are higher and your body should be as straight and straight as possible. You should repeat this second exercise for 3 times, holding for 30 seconds in each set. As in the previous case, you should rest – 10 seconds – after each repetition. Breathing and a tight abdomen are essential, otherwise you could damage your back.
  5. The third exercise will consist of supporting the weight of your body on elbows and toes, but in this case with your legs open, that is, opening your legs in a ‘V’ shape. You should try to always keep your back straight and never relax your abs. In this case, it will be a tougher exercise; So, repeat the exercise 2 times, 30 seconds each and resting for 10 to 15 seconds.
  6. Next, you should continue with the same posture as in the last exercise and, in this case, open and close your legs one at a time. That is, open right, close right, open left, close right, and so on. In this case you should perform 4 sets of 30 seconds each, resting for about 5-10 seconds between each set.
  7. Once you’ve finished this workout, you’ll need to turn around and do ‘conventional’ crunches. In this case, you should do 4 sets of 25 each. Therefore, lie on your back with your knees bent and go up and down; Always look up at the ceiling and breathe and breathe in as you go up and down.
  8. Finally, go back to the hard abs’ workout routine once again. Once you’re done, you’ll have done a hard ab workout.

What do you need to do your abs?

  •  Mats, thin mat or towel.
  •  Comfortable clothes for exercise.
  •  Music -optional-.
  •  Timekeeping watch.
  •  Time.
  •  Constancy.
  •  Dedication.

Tips for Marking Abs

  • The proposed exercise routine is quite harsh; You can start by doing a gentler workout and increase your power and routines as the days go by.
  • Keep in mind that it is very important that you are consistent when doing physical activity, otherwise you will not see the results.
  • In the category about abdominal exercises, you will surely find much more interesting information.

How To Choose Between Yoga and Pilates

0

When it comes to starting to practice a sport, there are always some doubts about it. One of them is that we don’t know how to choose between yoga and pilates.

How To Choose Between Yoga And Pilates

Both sports are very fashionable in recent years, which makes it quite difficult to choose between yoga and pilates, since both sports are great and both sports will provide us with a lot of benefits for our body and mind.

In addition, people who start practicing sports usually do not have much information about it, something that affects the decision to choose between yoga and pilates.

Most of the people who advise you are going to try to pull towards their turf, as those people want to attract customers to their business, so their opinion is not valid, as it is not impartial.

These people are really going to confuse you in the task of choosing between the two, therefore, it is better to rely on a more neutral opinion from someone who knows these two sports.

If you want to choose between yoga and pilates and have no idea which one to choose, you are in the right place, as you are in the sports section of doncomos.com. Here you will learn step by step everything you need to know about these two sports, so that you can decide to choose.

What do you need to choose between yoga and pilates?

  •  Places to sign up for yoga or pilates.
  •  Read this article that explains how to do yoga at home.
  •  Read this article that explains how to do pilates at home.

Instructions for Choosing Between Yoga and Pilates

  1. Look at your goals:
    The first thing you should do is look to see what goals you have for playing a sport. The goals you are looking for can be anything from losing weight, increasing flexibility, increasing your lung capacity, or even increasing your peace of mind. If you are looking to lose weight, Pilates is your sport, since its great muscular and physical load will make the body work much harder and we will lose many more calories than with yoga. If our goal is to increase flexibility, both sports are fine, but I would choose yoga more, as the poses are more static and more natural. As for lung capacity, we are going to choose Pilates, since it is much more cardiovascular than yoga, since we move much faster and at a higher pace than yoga. As for peace of mind, yoga is your sport, because if you are looking to be calm, learn to breathe, lead a good lifestyle and find peace with yourself is the ideal sport for you.
  2. Health status:
    The second thing we must look at is the state of health we have, which will be influenced by our physical activity, our age and our genetics. Pilates is a sport that requires much more physical effort than yoga, therefore, if you are an older person and who is not used to doing sports, it is better to go to yoga for the time being and then if you want to move on to pilates when you are a little fitter. If you are a young person looking to be active, yoga may not be for you because it is too leisurely, therefore, it is better to do pilates.
  3. Which people stand out in each sport?
    We all like to be the best at the sports we play, which can make the difference between choosing one sport or another. In the case of yoga, people with greater self-control and greater flexibility will triumph, therefore, it is usually a sport more oriented to flexible and calm people. As for Pilates, people with a lot of energy, great physical condition and great endurance triumph, therefore, it is usually an ideal sport for people who are used to doing physical activities, which usually fails in yoga because they are too energetic and impatient.
  4. Price:
    Another aspect to consider when practicing yoga or pilates is usually the price. I’ve noticed that yoga is a little more expensive, since it’s not usually as easy to do as pilates and therefore, the specialized teacher charges more. Even if the difference isn’t very big, if you don’t have a lot of money, you’ll do better with Pilates.

Tips for choosing between yoga and pilates

  • Do both: Why choose between yoga and Pilates when you can practice both? If health, time and money allow it, I advise you to do both, as this way you will make the most of the advantages of both sports. You will increase flexibility and peace of mind with yoga and with Pilates you will lose weight, increase your physical condition and gain strength. In addition, playing two sports is fun because while you practice one, you forget about the other, which kills the monotony.

How To Choose a Fitball

0

Fitball are very fashionable. These are large balls that are also called Swiss balls. These balls are made of rubber and were manufactured for the first time in the seventies of the last century. From the beginning, they were used for therapeutic purposes. Nowadays we are used to seeing them in gyms and fitness centers and their use has become so fashionable that we can even see them in many homes.

How To Choose A Fitball

Fitball are a very useful fitness item as they allow you to build muscles while working on your muscles and balance. In addition, fitball can be used by all kinds of people, from athletes to pregnant women.

You may be wondering what sports these types of balls are used in. Well, the answer is that it is used in many different sports. Perhaps one of the most popular is Pilates. Pilates was one of the first sports that began to use these balls more or less regularly in its sports practice. This should come as no surprise since Pilates perfectly combines therapeutic intent with the development of muscle building, endurance and flexibility. However, there are other sports that also employ fitball. Sports that have become tremendously popular nowadays such as CrossFit or functional and high-intensity training also use it.

As you can see, there are many different methods and approaches when it comes to training with these balls. Therefore, you have to know very well what you are doing with them and what you want to achieve at all times. Another important issue is that of size. The size of a fitball is of great importance, especially when we use it in sports such as yoga or pilates. The size of fitball we will choose will depend, to a large extent, on our height. Throughout this article, we’ll explain how to choose a fitball. Pay close attention!

What do you need to choose a fitball?

  •  Follow all our instructions

Instructions for Choosing a Fitball

  1. There are basically two ways to determine if a fitball is right for us or not. The first one we will explain is the one we use in a store when selecting our fitball. Then we will have to look at the size of the fitball since these are normally sold deflated. On the other hand, the second explanation will be the one we use in our gyms when choosing a fitball whose size we do not know. 
  2. The easiest way to choose a fitball when buying from us is to look at its size or size. This information is indicated on all boxes. What we need to look at is the diameter of the fitball and compare it to our height. In this way, people who are less than 1.63 meters tall must purchase a 55-centimeter fitball. People whose height ranges between 1.64 and 1.79 should use a 65 and, finally, those who are taller than 1.80 should select a fitball with a diameter of 75 centimeters.
  3. However, when the fitball are not in their boxes and we do not have this data, it can be a little difficult to know which one is right for us. In such cases we can employ a rather useful trick. This consists of sitting on the fitball and observing the angle formed by our knees with respect to the ground. If our knees form a 90-degree angle, that’s the sign that we’re looking at the perfect fitball for us. 

Tips for Choosing a Fitball

  • Remember that the size of the fitball is very important. If you perform your maintenance exercises on a fitball that’s too big or too small for you, all your effort may be useless. 
  • The maintenance of your fitball is a pretty important issue. You need to make sure that your fitball stays in good condition during all your training sessions. For this reason, you should get into the habit of wiping it every time you finish a session with a damp cloth. You should also check the air pressure that exists. Remember that a fitball shouldn’t be too hard, but it shouldn’t be too soft either.

How To Calculate BMI

0

Worrying about our body and weight is a very common and natural problem among all of us. Keeping the body at its ideal weight is vital for our health, since being overweight or underweight can be very dangerous and uncomfortable. Therefore, knowing and maintaining our proper weight is very important for our physical and mental well-being. Along these lines, knowing our Body Mass Index (BMI) is very important and recommended, as this way we can control ourselves at what weight we should maintain to be healthy.

How To Calculate BMI

BMI is a measure that associates a person’s mass and height. With this indicator, it is possible to calculate whether a person is really overweight or underweight or, on the contrary, if they are at their ideal weight. In fact, BMI is used to classify a person’s weight status. For all these reasons, today in doncomos.com we explain everything you need to know about how to calculate BMI simply and in four simple steps, so that you can monitor your physical well-being from home.

What do you need to calculate BMI?

  •  Balance.
  •  Height gauge or tape measure.
  •  Conventional calculator.

Instructions for Calculating BMI

  1. First of all, you should know that the Body Mass Index is a nutritional indicator that is calculated from the following mathematical formula:
    In this case, the mass is expressed in kilograms and the square of the height in square meters. Therefore, the result -BMI- would be presented with the unit of measurement kg/m².
  2. In this sense, you should also know that we are talking about a common calculation for both men and women, so the way to calculate it is exactly the same regardless of your gender. Also, keep in mind that this nutritional index can only be applied to adults, i.e., people over 18 years of age.
  3. Once you are clear about these concepts, you can proceed to calculate your BMI. To do this, in the first instance you must weigh yourself – use a scale if you have at home, failing that you can also go to a pharmacy. Keep in mind that it will be very important that your weight and height data are fully updated in order to make this calculation accurately and in detail. We recommend that you weigh yourself first thing in the morning, so that your bladder and rectum are empty, that is, we recommend that you do it when you have gone to the bathroom even if it is to urinate; preferably on an empty stomach and underwear. It’s also important that you always do it at the same time of day, so you can make comparisons.
  4. Next, you need to measure your height. To do this, you can use a height meter or a tape measure that you have at home or, failing that, as we pointed out earlier, you can go to a pharmacy – there is usually a machine specialized in weighing, measuring and automatically calculating your BMI.
  5. Once you have exactly calculated your weight and height, you can proceed to make the formula that will reveal your BMI. To do this, you must apply the formula by replacing the mass indicator with your exact weight (the kilograms marked on the scale at the time you weighed yourself) and substituting height for your height squared – that is, multiply your height by itself; For example: if you are 1.80 meters tall, you should multiply 1.80 x 1.80 = 3.24 square meters).How to calculate BMI
  6. At this point, you will have the formula above in which the mass (kg) should be divided by the lowest figure (height squared). Once this is complete, you can proceed with a conventional calculator to perform this operation: divide the top figure by the bottom number. That is: your mass (kg) / your height squared (m2).
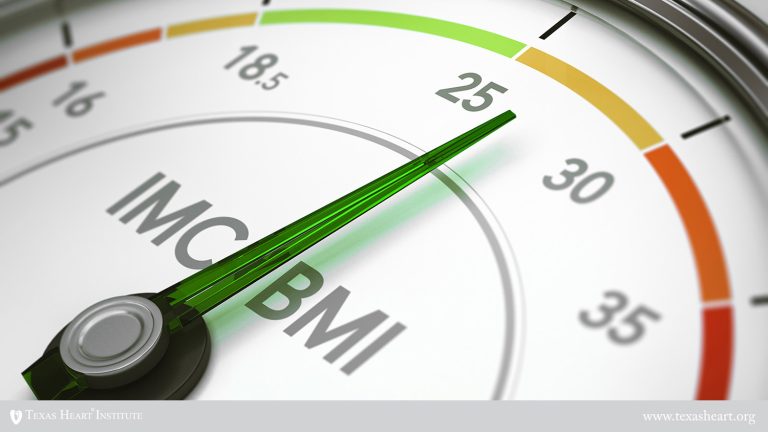
  7. So that you can check if you are at your ideal weight or, on the contrary, you should take steps to achieve a healthy weight, here is the table with the optimal values:
BMIClassification
<18.5Underweight
18,5-24,9Normal weight
25-26,9Grade I overweight
27-29,9Grade II overweight (pre-obesity)
30-34,9Type I obesity
35-39,9Type II obesity
40-49,9Type III (morbid) obesity
>50Type IV (extreme) obesity
  • Once you have checked your BMI, you should decide if it is necessary for you to go to a specialist – dietitian or doctor – so that they can advise you on a diet or physical exercises so that you can reach your ideal weight and lead a healthier lifestyle.

Tips for Calculating BMI

  • Keep in mind that this process can also be done through specialized websites that automatically calculate your BMI with specific calculators for this purpose. So, here we attach a link (www.seedo.es/index.php/imc) so that you can calculate your BMI just by entering your weight and height.
  • If your BMI tells you that you are overweight, you can resort to exercise and eating habits that can easily reduce your weight. In this case, we recommend that you do moderate exercise daily and eat fruits and vegetables. In addition, adding berries and fiber-rich foods to your daily diet will also be very useful.

How To Breathe in Pilates

0

Pilates is a very complete exercise that helps you regain the flexibility of your body and keep all your muscles toned. Contrary to the popular belief that Pilates is a soft and easy sport, we are faced with a very demanding sport that is quite difficult for beginners to follow.

How To Breathe In Pilates

Pilates is based on three general principles. The first of these is the one that refers to the abdominal and lumbar area of our body. It is about strengthening, at all times, these parts of our body and therefore we must keep them tense throughout the training. Relaxation is the second of the basic principles. All exercises should be performed calmly and leisurely.

You have to try to maintain a state of continuous relaxation throughout the Pilates session. Finally, the last pillar on which this sport practice is based is breathing, which is what we are going to focus on in this article. Breathing is one of the most important parts of all exercises and during its performance you must try, at all times, to breathe deeply and calmly. In this way, our body’s respiratory channel must be open at all times to facilitate our breathing. Here are all the keys to how to breathe in Pilates.

What do you need to breathe in pilates?

  •  A quiet place
  •  A yoga mat

Instructions for Breathing in Pilates

  1. The breathing that you must perform in Pilates is called diaphragmatic breathing. In this breath you should try to introduce as much air as you can to the lowest area of your lungs. If you are not able to perform this type of breathing, you should just practice following the tips below.
  2. Relax. Lie on the floor on your back and try to relax. Close your eyes and avoid thinking about anything. 
  3. If you want, you can help relax by lighting some scented candles and putting on some very soft music.
  4. Breathe through your nose and try to send the air into your stomach area. Put your hands on your belly and feel it rising. Don’t elevate your chest area, just your belly.
  5. When you can’t keep breathing, expel all the air from your lungs. You’re going to do this through your mouth. To help you expel the air, you should squeeze your lower abdomen. This way you will notice how your belly sinks downwards. Practice for several minutes until you are able to automate this type of breathing.
  6. As soon as you’re able to do belly breathing, try doing it while doing Pilates. Remember that relaxation is the key.

Tips for breathing in Pilates

  • Learn much more about Pilates here where you will find much more information
  • If you notice that when doing Pilates, you have a hard time maintaining good breathing, you may not be used to breathing properly. This shouldn’t alarm you as it’s very common in adults. Infants and young children usually perform diaphragmatic breathing naturally. However, as we become adults, we tend to change this type of breathing. This happens because breathing is a process that we do automatically without stopping to think about how we do it and although we are born naturally breathing with the diaphragm, over time we transform our way of breathing. This is mostly due to bipedalism. When standing for so long or standing with our upper body vertically, we tend to breathe with the upper part of the lungs. In this way the breathing is much shallower and we get much less air. It should be noted that this type of breathing is not bad in itself since we are able to acquire the air, we need but when we make efforts, such as a Pilates session, this air is not enough and therefore it is convenient that we relearn to breathe with the diaphragm as we did instinctively when we were little.
  • If you have a hard time following your breathing in Pilates, you could dedicate some of your time to relaxing and meditating. These exercises will allow you to control your breathing more and more. 

How To Be More Flexible

0

For us, being more flexible is very important, since many times we stay in such a sedentary life that when we find ourselves in the need to move and stretch it is painful, unpleasant and difficult to do.

How To Be More Flexible

The older we are, the stiffer our tendons and joints in general will become, for this reason throughout our lives, we must maintain a good state of flexibility, we are all born flexible, but the lack of activity makes us stiff and lose this flexibility.

Flexibility is not only necessary for those who are dedicated to acrobatics, dance, or martial arts, it is necessary to be more flexible throughout our lives, so that when we reach an advanced age, we can stay active and in good condition.

If we do not maintain a good state of flexibility during our youth and maturity, when we reach an older age, it will be more difficult for us to execute certain common movements. For this reason, we must find a way to be flexible and maintain this agility throughout our lives.

If you want to be more flexible, there are many methods that will help you, we will show you some of the ways that will help you to be more flexible day by day.

What do you need to be more flexible?

Instructions for Being More Flexible

  1. The first thing to keep in mind is that to be more flexible you have to keep your body moving, and that doesn’t just mean walking or grooming, but all your muscles. Start by doing calisthenics, to do this jump while opening your legs and close them when you go down, also open your arms while jumping. When you feel that your legs are warm, you can stretch.
  2. You should never do stretching exercises without first warming up your muscles, as this could end in a severe muscle tear.
  3. Depending on which part of our body we want to be more flexible, it is the one we will train most often, but we must exercise our whole body. If you want to have more flexible legs, sit on the floor with your legs open and slowly lower your torso, you will feel how the tendons in your legs stretch.
  4. In case this is too painful for you, then just do the same movement but bringing your feet together and bringing them close to your pelvis, then lower your torso little by little. Do this exercise for five minutes.
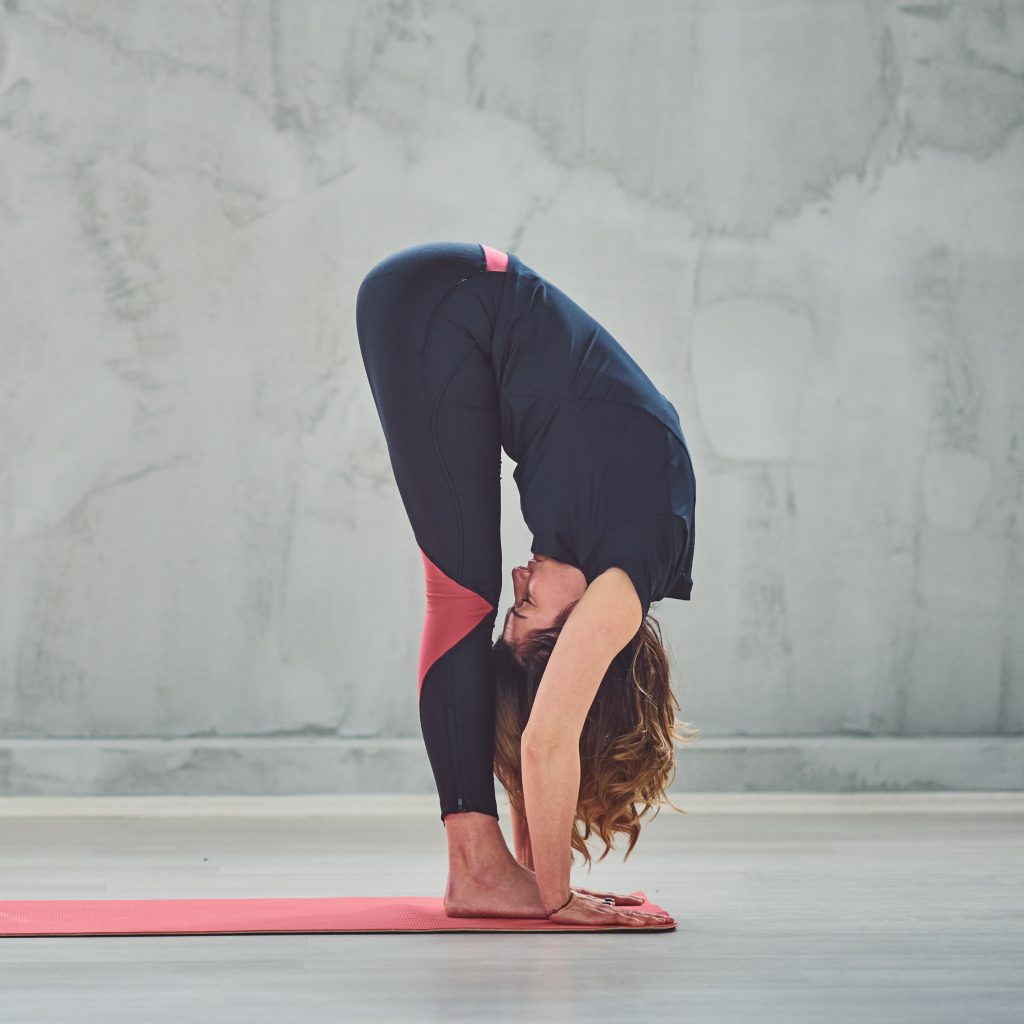
  5. To have a more flexible back we will start by standing and keeping our legs as straight as possible, then we will lower our back little by little by hunching it trying to touch our knees with our head. We’ll do five repetitions of this movement.
  6. To have more flexible arms you will stretch your arm trying to bring it towards your opposite shoulder, for this you will use the other forearm. Repeat this movement five times with each arm
  7. Direct your arms back and interlace your fingers, with your legs straight bend your torso as in the previous back movement, but this time lift your arms back keeping them straight, as if you wanted to bring them towards your head. This will give flexibility in your back and arms.
  8. Visit our cardio and jogging category to learn more about the correct practice of this sport after you have done the appropriate stretches.

Tips for Being More Flexible

  • You can practice martial arts, gymnastics, Pilates, or yoga to gain flexibility and agility.