Home Blog Page 12

How To Gain Muscle in The Chest

0

Knowing how to gain muscle mass is essential for all those who are concerned about maintaining optimal fitness. For this it is necessary to know the correct way to exercise a muscle, as well as the way in which they should be developed. In this case we are going to focus on one of the parts of the body that most concern athletes and is to know how to gain muscle in the chest.
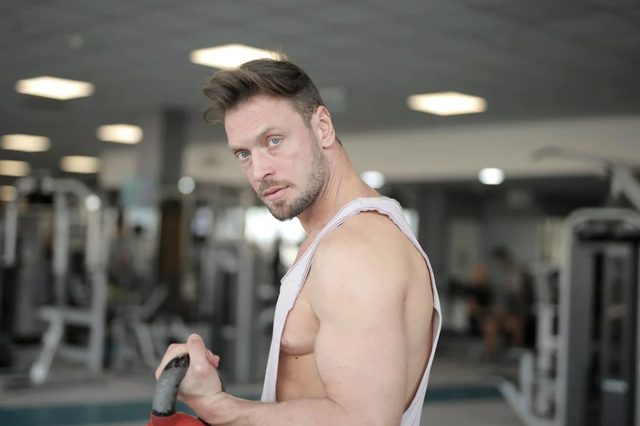
How To Gain Muscle In The Chest

In this way, if you are one of those people who is concerned about improving their physical shape and who wants to gain muscle mass in the pectorals and thus increase strength, we bring you a chest routine that will help you achieve the best results and, therefore, you can get to fulfill your mission.

Routine to gain muscle in the chest

Knowing how to gain muscle in the chest implies having to carry out an appropriate routine for it, in addition to training with effort and, in addition, following an appropriate diet that allows you to obtain the best results. That said, it will be time to indicate the different exercises that must be followed to increase the muscle in the chest.

Flat press on the ground

The bench press is one of the most popular chest exercises and one of the most basic, there are different variants to be able to carry out. One of them is to make the flat press from the ground, which is also known as “floor press”.

It is an exercise that involves different joints and that allows to develop strength in the upper train, which also helps to improve the blocking force for the bench press. In this exercise, the triceps, pectorals, rhomboids and stabilizers of the scapula are involved.

To do this, you have to follow these steps:

  1. First of all, you have to stand with your legs bent on the floor, making your shoulders in contact with the ground.
  2. Now hold the bar in a wider way (slightly) than the width of the shoulders and start with the arms extended and the bar on the chest.
  3. Then the bar should be lowered to the base of the chest until the triceps touch the ground, at the same time that the elbows make an angle of about 45 degrees.
  4. You must complete the repetition with a full extension of the arms. It is recommended to do four sets of 10,8,6 and 4 repetitions, and whenever possible increase weight.

Flat openings with dumbbells

Another exercise that should be part of your routine if you want to know how to gain muscle in the chest is to make flat openings with dumbbells, which help enormously when it comes to building muscles, increasing thoracic expansion, improving lung capacity, and increasing the range of motion of the joints.

In this case, we find an exercise that involves the lower and upper pectoral, as well as the anterior deltoid and the short head of the biceps brachii. To carry it out, these steps must be followed:

  1. First you will have to lie on a flat bench, with your feet on the floor or supported, as well as your back and head.
  2. Now holding the dumbbells vertically to the chest and with a slight separation, with the palms towards the center and semi-flexed elbows.
  3. Inhaling deeply, it descends until it reaches the height of the pectoral.
  4. Without modifying the flexion of the elbow, it is necessary to raise again vertically and inwards while expiring. At all times you have to make controlled and slow movements.

Inclined press with dumbbells

After the two exercises mentioned it will be necessary to make an inclined press with dumbbells, with which the upper part of the chest is worked. With this exercise the triceps, pectoralis major and anterior deltoid are worked.

The steps to follow to do this exercise to know how to gain muscle in the chest must be performed these steps:

  1. First of all, you have to sit on a bench with an inclination of between 30-45 degrees, resting your feet on the floor. The head and back should be kept in contact with the bench.
  2. Then take a dumbbell with each of your hands and place it in a horizontal line with your shoulders.
  3. Now you have to inspire and extend your arms vertically, while the dumbbells are approached, and the air expires when you finish with the movement.
  4. Finally, return to the initial position and proceed to repeat the movement.

Pectoral pullover

A fourth exercise to perform is the pectoral pullover with dumbbell, an exercise that involves different muscle groups, such as pectoralis major, latissimus dorsi, triceps, redondo major, serratus anterior, rhomboid and pectoralis minor.

To carry it out you have to do the following:

  1. You have to stand on a flat bench, with your feet on the ground and your head on the edge of it.
  2. With the palm of the hands, you have to hold a dumbbell on the part of the disc.
  3. With the elbows semi-flexed, the dumbbell will have to be lowered in a controlled and slow way above and behind the head. It should be noticed how the pectoral muscles are stretched.
  4. Then it is pushed back to the vertical of the eyes while contracting the pectoral. It exhales when it finishes climbing and returns to the initial position

How To Firm the Buttocks

0

The buttocks are one of the muscles of the body that most make the difference between a beautiful body and a body that is not so much. This part of the body is known to all of us and everyone wants to have firm and toned buttocks.

How To Firm The Buttocks

The gluteus is commonly known as the buttocks and is a muscle that is divided into two equal hemispherical parts, which are separated by the anus. The gluteus is a very strong muscle that is used a lot when walking and exercising.

However, with age and sedentary lifestyle, this is a muscle that falls and loses the firmness that previously characterized it. The muscle becomes smaller, less firm and in the end, this results in quite ugly buttocks.

If you want to have a perfect ass this article and a lot of effort will help you get it.

The problem with this is that both men and women consider beautiful buttocks as something attractive. Men like a woman with firm and well-trained buttocks, while girls enjoy a man who has proportionate legs with his torso and a firm buttock.

Moreover, many men hate women who do not have firm buttocks, being a great possibility to discard when choosing a suitor. In the case of women, something similar happens, the best example being gym boys who do not train their legs, which have a very developed torso, but do not have a leg and look disproportionate.

For this reason, whether you are a man or a woman, it is a good idea to work your buttocks so that they recover the firmness they had before. If you have never had it firm, do not worry, as you can also make them firm and beautiful. You just have to follow these tips very carefully and you will achieve it.

Instructions for firming the buttocks

  1. Do squats:
    Squats are the best exercise for the gluteus, without any possible discussion. This exercise consists of loading weight on a bar on your back and lowering until your knees and buttock form a right angle, better known as parallel. The squat is good for the whole leg, but especially for this muscle, since it is the one that makes practically all the force when going up and down. Be sure to throw your buttock back when you go down, keeping your back straight at all times, because if you pull your back you could lead to injuries. In addition, go down to the parallel and do not stay half as many people do, because if you stay halfway, the leg will not train correctly and you will not look these firm buttocks. Start with a low weight, since it is better to master the exercise first than to put many kilos. Once you master the exercise with a certain weight, increase the weight to be able to do at least 10 repetitions with that weight without failing the technique. Perform the squats once or twice a week, on leg day.

Hip trush:
This is an exercise that, although it is not well known in the world of ordinary people, in the world of the gym is one of the best exercises known for gluteus. The hip trush or hip movement, consists of loading a bar with weight in the hip area, placing it just above. We will place ourselves sitting in a position of 45 degrees with space between the lower back and the floor, to be able to go up and down. It is best to lightly support the upper back and stay with that angle. Now we are going to place the bar and we are going to climb with force with the hip up, until you stay straight. Then you will go down to the starting position and repeat again. This exercise is so good because it is isolation of the buttock, serving very well for people who have trouble using the buttock correctly in the squat. In addition, here you will check the strength of the buttock, checking how you can load real weight on the bar and lift them without problems with the buttock. Again, try to start with a weight that you control well and when you master it, move on to the next weight to be able to have everything controlled and be able to develop more strength. Perform this exercise also on leg day, just after the squats is a good option.

Perform sprints:
Although the high-intensity exercise of running very fast is more for the quadriceps than for the glutes, it does indirectly affect this area. The best thing about this exercise is that you will not need a gym to do it, becoming a good option for people who do not want or cannot go to a gym. The way to do this is by performing sprint intervals of 100 meters, running these 100 meters at the maximum speed you can and then resting a little to do another. Depending on your level, do between 5 and 10 sprits and rest between 1 and 3 minutes, all depending on how trained you are. Doing this a couple of times a week, you will notice how you not only tone and firm the buttock, but you will also lose fat, something that as we are going to explain now, makes you look better.

Lose fat:

In most cases, a buttock that is not firm is due to excess fat in it. In these cases, the buttock is covered by fat that falls down, causing that effect of the fallen buttock that we like so little. What you have to do is be at a low percentage of fat, something that will help you make the buttock look much better.

  1. Dieting: Without dieting it is impossible to lose weight, that’s the bad news. However, the good news is that we do not have to do the typical doctors’ diet of removing things, but what we must do is create a caloric deficit by eating everything. Try to eat 500 fewer calories than you expend, something that will cause you to lose weight. To count calories, use the nutrition information behind the food product you’re consuming and use a kitchen scale to weigh everything you eat. Do not forget about condiments, sauces and others, that also makes you fat.
  2. Do cardio: Apart from doing hit, you must do low-intensity sports to be able to lose weight. Here we have options such as running, cycling or walking long distances. Perform 2 times a week exercise of this type and you will notice how you begin to be much more toned and firmer. Also, lead an active life and do not sit on the couch all day.
  3. Build muscle: In addition to training leg and gluteus, we must train the rest of the body. First of all, for aesthetics, since a beautiful body is proportionate. Secondly, because muscle burns more calories and the more muscle, the more calories we burn at rest and the more we lose weight by eating the same. If you are a girl, do not be afraid, you will not get like a Miss Olympia by training the upper part, but you will get a firmer body in every way. So, whether you are a man or a woman, train your whole body and everything will be better.

How To Exercise Your Fingers

0

Usually, those who want to look good focus on exercising their body. Especially the buttocks, chest, abdomen and legs. The more toned they are in these areas of the body, the greater the personal gratification they experience and the better they feel about themselves.

How To Exercise Your Fingers

In reality, those who exercise do so to improve their physical appearance and not to gain more strength. This is only the case for a minority. However, strength plays a very important role in the different activities we perform throughout the day, from opening a door, to closing the lid of a jar.

Now, no matter what task we are going to perform, one of the parts of the body that we use the most, consciously or unconsciously, are the hands and feet, which includes the fingers. Therefore, is it important to exercise them to strengthen them? Of course! But how can we do it? What is the procedure we should follow? What do we need for this?

During this article we will be answering these and other questions. So, when you finish reading it, you have the necessary knowledge to properly exercise your fingers, without the slightest risk of suffering some type of injury due to a bad movement.

In fact, you can get down to work today, to strengthen your fingers and improve their ability to respond to the different stimuli we give them. For example, when typing on the computer, when holding an object, when applying force to open a door, etc.

Therefore, get comfortable and pay attention to the following instructions. You will see that you will not regret having invested just a couple of minutes in getting skills that will be useful for life and to perform different types of activities, both simple and complex.

Instructions for exercising your fingers

The fingers of the hands allow us to hold objects, point, give instructions, exert force, etc. While the toes make it possible for us to maintain balance, that we can walk on different types of terrain and that we do it with balance and precision. Hence the importance of exercising them constantly.

But how can we exercise our fingers? Following the instructions below:

  1. Keep your fist clenched. The idea is that your thumb stays on the other fingers, without hiding it. Press for about 30 seconds or a minute. Then, open your hand and stretch your fingers as much as possible. If you notice that you cannot do more than 4 repetitions of this exercise, do not let the parrot go away! That’s only indicative of a lack of training. Do as much as you can without straining your muscles too much. The more times you try you will notice that you will be able to do more repetitions.
  2. Rest your hands on a flat surface. Place your hands on a board or some other similar surface and support it by flattening it as much as possible. Hold this same position for about 30 seconds or a minute. Then, leave the position and relax your hand. You can start by doing about 4 repetitions in each hand.
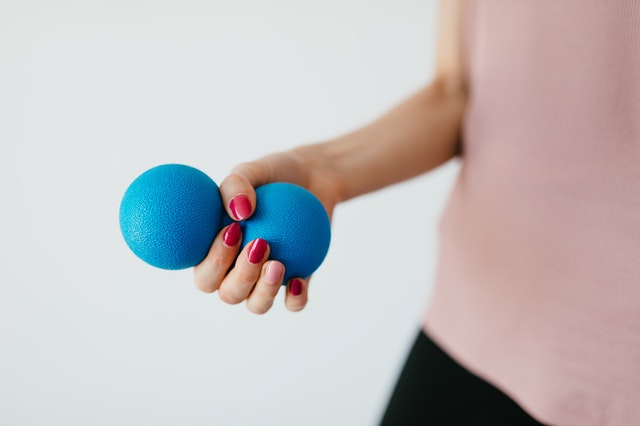
  3. Squeeze a ball over and over again. Thanks to this exercise you will be able to strengthen your grip. The correct way to do this is by holding a ball in the palm of your hand and then squeezing it tightly for about 5 seconds. Then, you can release it and repeat the exercise 10 to 15 times, if possible. It is important that you do not overdo it 2 or 3 times a week, because rest plays a fundamental role in strengthening the muscles of the hand and fingers.
  4. Do claw exercises. This exercise involves placing your hands facing you, so that you can see your palms. Then, bend your fingers by making the tips rest on their joints. In such a way that, in sight, your hand will be similar to the claw of a feline. Hold that same position for 30 seconds or a minute. Then, leave it and rest. If possible, do four repetitions of this same exercise on each of your hands.
  5. Touch all your fingers with your thumb. Touch each finger with your thumb. When doing so, make sure that with each touch you manage to form a circle. You can also touch the pads of your fingers with your thumb, forming an oval or egg. Try doing 4 repetitions of this exercise.
  6. Use a play dough, soft clay, or a soft ball to pinch a little using your fingers and thumb. Hold the pinch for 30 seconds and release. If possible, do about 10 or 15 repetitions. You can do this exercise about 2 or 3 times a week, leaving intermediate days to rest.
  7. Raise your fingers. Place your hands on a table, or other smooth surface, palms down. Then, lift each of your fingers, including your thumb, one by one and lower them again. Do about 4 repetitions of this exercise in each hand.

How to exercise your toes

There are different ways to exercise your toes. You can try the following:

  1. Lift your toes. To do this, you must stand barefoot on the floor and try to lift each of your fingers, one by one. While it is true that this might be a bit difficult at first, you can try it at least once a day. This exercise will be very useful to strengthen and make your toes more flexible.
  2. Tread with your fingers. While barefoot, take a few steps while standing on tiptoe. Although this is a challenge to maintain balance, it will give you the opportunity to determine how strong your toes are.
  3. Lift your foot, point and bend your toes. The first step is to get up by supporting yourself with the front of your feet. Tiptoe your foot and bend your toes down, while balancing with the opposite foot. Hold this position for about 5 seconds, return to the starting position and repeat the exercise with the other foot.
  4. Stretch your foot with an elastic band. This should be done while sitting with your legs extended. Place an elastic band around your foot, below your toes. Then, stretch your foot in the direction of the shin until you can feel the tension of the band. Then, do it with the other foot.
  5. Lift objects with your toes. Instead of bending over to grab objects that have fallen on you, do it with your toes. For example, a pencil, a flannel or some other small object. Hold it on your fingers for about 6 seconds before changing position. This is a very easy exercise to do and you can do it at any time of the day.
  6. Walk on rocks. Of course, you need to make sure they’re not sharp to avoid cutting yourself. Walk on them comfortably and naturally. This will cause the nerves of the feet that are related to those of the back to be exercised and both to be strengthened.

As you may have noticed, these are very easy exercises to perform. But what do you need to be able to carry them out?

What do you need to exercise your fingers?

Actually, you don’t need many things to exercise your fingers. On the other hand, the few you need, are at your fingertips. So, you don’t have to go out and buy it or invest money to acquire it. Some of the basic things you will need are the following:

  • Dull rocks.
  • An elastic band for exercise.
  • A pencil or some other similar object that you can lift with your foot.
  • A piece of plasticine or soft clay.
  • A rubber ball.
  • A flat, smooth surface, such as a wooden wall or table.

In addition to these things, you’re going to need to gain from exercising your fingers and perseverance to do it. Something that will help you not throw in the towel is to establish a simple training routine that you can do every two or three days. You will see that the results begin to be noticeable after a short time.

Tips for exercising your fingers

If possible, do the exercises at home in front of the mirror. This will give you the opportunity to check the way you are doing them, monitor your performance from different angles and make any necessary corrections.

In case you are not sure how to do any exercise, it is best to ask for the advice of a professional trainer, to provide you with the proper technique when executing the movements.

If you have suffered from any injuries, such as a sprain or fracture, consult your doctor before starting a finger exercise routine, as this could worsen your current condition.

Don’t go beyond your safety limits. The moment you feel pain, you should stop, because that is the indication that your body needs to rest and that you exceeded what you used to do normally.

In case the pain is very intense, do not assume that it is something normal or temporary. Go to the doctor to check your condition, since you may have torn a muscle or suffered a sprain. In any case, it is better to be safe than sorry afterwards.

Now, if you put these suggestions into practice along with the training routine to exercise your fingers and toes, in a short time they will strengthen and help you perform your tasks much faster and more efficiently.

How To Exercise with A Chair

0

Covid-19 made more than one person aware of the need to exercise. Since they could not leave the house now, it was essential that they begin to devise different types of strategies in order to lead a more active life during the quarantine, since a sedentary lifestyle can have serious consequences.

How To Exercise With A Chair

Some of the risks of leading a sedentary lifestyle are: obesity, heart disease, high blood pressure, high cholesterol, stroke, type 2 diabetes and even some types of cancer, such as colon, breast and uterine.

In view of this, it is essential to perform activities that keep you moving. Some of them can be dancing, yoga, pilates, etc. However, some could excuse themselves by stating that they have little space in the house to practice any of these alternatives to perform an exercise routine.

However, the truth is that you do not need to have too large a space to exercise. In fact, you can do it in your own room, using a chair as a training tool.

Yes, a chair. Maybe this idea seems a bit strange to you. But the truth is that you can devise an entire workout routine using a chair as a support. If you don’t have the slightest idea how to do it, you don’t have to worry. In this post I will be telling you how you can do it.

This routine is so simple and entertaining that you’ll want to put it into practice today. Best of all, you can include other members of your family, such as children. Thus, you will spend quality time with them, while they stay active.

Remember that exercise has a very positive effect on our health. Therefore, do not miss any detail of what I will be sharing with you. See.

Instructions for exercising with a chair

The fact of performing a training routine with the help of a chair turns out to be a very practical alternative. It prevents you from having to leave your home to the gym and fulfills the same function. You will be surprised to know the number of exercises you can do using it as a support.

Some of the exercises you can do are the following:

The abs

One way to do them, while sitting, is by raising your knees to chest level. This is the procedure you should follow is this:

  1. Sit in the chair with your back upright on it, but without fully resting it on the backrest.
  2. Place your hands around your hips.
  3. Keep your legs together and raise your knees to your chest, while contracting your abs.

Biceps curl

This exercise will help you tone your biceps. I’ll be showing you two alternatives. The first is as follows:

  1. Holding a one-liter bottle of water in each hand, flex your elbows lifting the weight.
  2. Then, lower both arms at the same time, but in a controlled manner.

The other exercise is exactly the same, with the difference that, in this case, you will alter each arm.

Elevation

Although it is a very simple exercise, it is also very complete, since it not only strengthens the abdominals, but also works the quadriceps and trunk.

  1. While sitting on the edge of the chair, rest your palms behind your buttocks.
  2. Then, raise your bent legs and then extend them forward.

Climbers

With this exercise you can work the middle area of the body, while burning calories. To do this:

  1. Stand resting your hands on the back of the chair.
  2. The feet should be separated and supported on the ground.
  3. Raise your knees to your chest, alternately.
  4. Start gently and then increase the speed on each climb.

Stretching

This exercise is ideal as a warm-up, but also at the end of your day’s routine.

  1. The first thing you have to do is raise one leg and rest it on the chair.
  2. Then, lower your back to take your foot in flex.
  3. Pull back, hold on for a few seconds and switch legs
  4. In order to decongest the muscles of the upper part, sit with your back straight, interlace your fingers and raise your arms above your head, while you have them stretched.

Back

For this exercise, you must have the help of a ball.

  1. Sit with your back erect and your legs slightly open.
  2. Descend slowly until you get the ball.
  3. Then, climb up with your arms stretched over your head.

Buttocks and quadriceps

To perform this exercise, use a towel:

  1. Hold your leg with the towel and bend it towards the back at ankle height.
  2. To exercise the buttocks, raise your leg until you rub them with your heel.
  3. To strengthen your quadriceps, hold this pose and flex the leg you’re using for support a little.
  4. Then, change limbs so as not to overload them.

What do you need to exercise with a chair?

To successfully perform this training routine, you only need to have the following elements:

  • A chair that is firm and has a back, so you can lean on it when needed.
  • Two bottles of water of one liter each.
  • A ball.
  • A hand towel.
  • Comfortable clothes to move easily.
  • Appropriate sports shoes to avoid slipping and falls.

Tips for exercising with a chair

As you may have noticed, this exercise routine with a chair is quite simple. You don’t need to be a professional to put it into practice. However, make sure that tension occurs when stretching, in order to obtain satisfactory results.

Practice these exercises for 45 minutes a day. You can do it every day or with a rest day in between.

Remember to stay well hydrated. When exercising, more sweating occurs and therefore the chances of you becoming dehydrated increase.

Accompany this exercise routine with a healthy and balanced diet. In this way, after quarantine, you can show off a firm and toned body. In addition, you will be protecting yourself against the dangerous sedentary lifestyle.

How To Exercise the Muscles of The Face

0

In general, those who want to look good, usually focus on working on the appearance of their body. That is, try to have a flat abdomen, firm arms, well-defined legs, rounded and hard buttocks, a firm chest and a stylized neck.

How To Exercise The Muscles Of The Face

However, the truth is that, with the passage of time, the whole body becomes flaccid, because the skin tends to lose its elasticity. In view of this, it is necessary to exercise every part of it, to look good and have a much younger appearance, such is the case of the face.

In fact, what’s the point of striving to have a firm body if your face is full of wrinkles? Some might mistakenly think that the only alternative to end facial wrinkles is plastic surgery. But the truth is that there are other options. One of them is exercise.

Yes, remember that the face is composed of several muscles and, therefore, it is also possible to exercise them. All you have to do is perform the appropriate training routine.

Now, what if you have no idea what it is? Do not worry about that, since I will be telling you what are the exercises you should do so that your nose looks thinner, your lips look thicker and your double chin is almost imperceptible. Actually, these exercises are a real miracle, if you do not want to undergo a painful surgical intervention.

In view of the excellent results you will obtain, it is worth putting them into practice, if possible, from today. Therefore, pay close attention, do not miss any detail and, while reading, try to execute each action that I will be indicating. This way you will be sure of having good results soon.

Instructions for exercising the muscles of the face

To strengthen your upper eyelids, you should:

  1. Place your middle fingers between your eyebrows, together above the bridge of your nose.
  2. As for the index fingers, these should go in the outer corners of the eyes, pressing slightly.
  3. Then, you should look up and contract your lower eyelids, just as if you were going to bring them to the top.
  4. The intention is that you can feel with your fingers the beating of the muscle that is on the outside of the eye.
  5. Then, you should squint and relax the muscle, alternately, about 10 times in a row. Do this while concentrating on the pulsations of the muscles.
  6. Finally, hold the contraction of the lower eyelid, while squeezing the upper ones, keeping your eyes tightly closed. Count to 40 and relax.

To stretch your forehead:

  1. Place both index fingers on the forehead, parallel to the eyebrows.
  2. Slide your fingers towards your eyebrows and look up.
  3. Press with your fingers on your forehead, trying to push your eyebrows up.
  4. Raise your eyebrows and then relax them. Repeat about 10 times.
  5. Then, raise your eyebrows and press with your fingers.
  6. Relax the muscles and massage the eyebrows in circular motions.

Exercise to shorten the nose:

  1. The first thing you should do is use your index finger to lift the tip of your nose up.
  2. Then, bring your upper lip down and bring your nose in that same direction. In doing so, you will feel how the tip of your nose pushes your finger.
  3. Hold that same position for one second.
  4. Relax your lip and repeat this same exercise about 35 times, trying to make breathing soft.

To shape the contour of your lips:

  1. First, you must tighten your lips, but without falling into the extreme of getting to pucker them.
  2. With your index finger, tap gently in the middle of your lips.
  3. Imagine you’re holding a pencil with your mouth.
  4. Then, remove your finger from your lips and hold them tight until you feel a slight burning sensation.
  5. Instantly, make a pulsating motion with your finger, right in the center of your lips and stop when you’ve counted to 30.

Exercises to minimize nasolabial folds:

  1. Separate your lips as if you were drawing with them an elongated oval.
  2. Make sure that the upper lip is tightly pressed against the teeth.
  3. Run your fingers from the corner of your mouth to the sides of your nose. Do it up and then down.
  4. Repeat the same movement until you feel a slight burning sensation.
  5. Then, make pulsating movements with your index finger up and down, quickly counting to 30.

To slim the face:

  1. Open your mouth and bring your lips to the inside of your mouth.
  2. Place your hands on both sides of the jaw and slowly slide upwards.
  3. Hold this same position until you feel burning on both sides of your face.
  4. Finally, raise both arms above your head and hold that position while counting to 30.

What do you need to exercise the muscles of the face?

Actually, to do these exercises you do not need tools or objects that help you. It will be enough with your hands and your fingers to perform them successfully.

Of course, it is necessary that you apply pressure on the points that I have indicated and that you place your fingers in the right place. Only then, you can get the results you want so much.

It should be noted that some of these exercises can be done sitting or lying down. That is, how you feel most comfortable.

Tips for exercising the muscles of the face

Before starting to perform these exercises, the recommendation is that you sit up straight and keep your stomach tight, as well as the muscles of the upper legs and buttocks. This way, you can focus on the facial muscles you’re going to work.

When working the muscles, it is necessary that you experience a burning sensation, palpitations and vibrations, only then will you know that you are performing the exercise effectively.

When you exercise your facial muscles, your fingers fulfill the same role as weights by providing the stiffness needed for the muscle to work more actively.

How To Exercise in Old Age

0

It has been proven that those who practice a sport, not only enjoy a better physical condition than those who do not, but also enjoy good health. Hence, experts in the field recommend doing some kind of physical activity.

How To Exercise In Old Age

It is true that, at times, this task could become uphill, in view of daily occupations, work, studies, raising children, etc. In fact, in the midst of so much work it is difficult to find time for other activities, even for recreational ones.

However, while you are young, it is likely that you have little awareness of the benefit that exercise brings to our body. But, with the passage of time, when the calamitous days of old age arrive, sedentary lifestyle begins to take its toll. Joint ailments, so-called ailments and other discomforts become a real problem.

What can be done to remedy the situation? We return to the point of origin. Something that can be very beneficial is to exercise. But is it recommended for people who are in the third age? Can they practice all kinds of exercises? How intensely should they exercise? What do they need to achieve this?

Through this article you will find out everything you need to know about how to exercise in old age, as well as the benefits it brings and what should be taken into account when doing so in order to obtain good results and avoid accidents or injuries.

This information will be very useful if you are in the twilight of life, but also if you have a family member at this stage and want to help them lead a much more active life. That way, they will be able to exercise and, at the same time, share quality moments that will strengthen their relationship.

Instructions for exercising in the elderly

Culturally, the elderly are usually related to a situation of absolute rest, where people concentrate on introspection and passive hobbies, such as reading, painting, etc.

But, reaching the third age should not be synonymous with a sedentary life. In fact, recognized entities such as the World Health Organization recommend exercise in people over 65 years of age, since these low-impact activities help improve their heart, respiratory and muscle functions.

Also, being able to do them in a group, brings an additional benefit. The better your interaction with your peers, the better your assessment of the quality of life you lead, as well as the physical, emotional and spiritual balance.

However, having the desire to do some physical activity does not mean that all are recommended for older adults. Ideally, they should exercise with activities that minimize the risk of injury and are indicated for people with this condition. Some of the exercises they can do are the following:

  1. Aerobics. Some of these exercises are low impact and, therefore, are recommended for seniors. For example, aqua aerobics, cycling, walking, jogging and aerobic gymnastics.
  2. Yoga or tai chi. These are ideal activities for older adults, since they do not involve great physical effort. In fact, in the specific case of yoga, its practice is highly recommended because it combines stretching, conscious breathing and meditation, which contributes to improving the flexibility and emotional health of the person. In the case of tai chi, despite being a martial art, it also includes the practice of meditation, so it is recommended if what you are looking for is to increase physical strength, agility and balance.
  3. Swimming. This is a lower impact activity than aquagym or other similar activities. In view of this, it is suitable for the elderly. On the other hand, it is a therapeutic and stress-relieving activity. When swimming, all the muscles are set in motion, which contributes to working the synchronization, while toning the body. It also relaxes and helps fight depression.
  4. The dance. This activity brings encouragement, joy and energy to the elderly. In addition, it is very entertaining.

On the other hand, it is ideal for working the body and mind, since the repetition of steps and the learning of choreographies is a very effective memorization work to prevent diseases such as Alzheimer’s and senile dementia.

Also, dancing gives them the opportunity to establish good social relationships and helps them express themselves through their body.

Exercises in the gym

But, if instead you would like to go to the gym, these are some of the exercises you can do:

  • Horizontal and vertical pushing exercises.
  • Horizontal and vertical transition.
  • Knee and hip dominants, etc.

No matter what exercise you decide to practice, the most important is the quality of the movements. Therefore, try to identify which muscles are involved with the practice of a certain activity, so you know which one best suit your current needs.

Now, since the desire to exercise is already there, what do you need to achieve it?

What do you need to exercise in old age?

If you decide to do aerobic exercises, you’ll need:

  • Light clothing: Try to wear a wide and cool shirt and loose pants that allow you to perform any number of movements freely.
  • Sports shoes: you cannot wear any type of footwear. You should choose one that has good grip, that does not slip, that is resistant and comfortable.
  • Water: it is important that you watch to be well hydrated when exercising, as dehydration could have negative consequences for your body.

To do yoga or tai chi:

  • Clothing that allows you to do movements such as push-ups and other types of stretching.
  • A mat on which you can sit or lie down.
  • A quiet and quiet place that allows you to meditate without distractions.
  • Water to hydrate you from time to time.

If you want to swim:

  • A swimming pool.
  • Bathing suit or appropriate clothing to wear in the pool.
  • A plastic bathing cap.
  • Special glasses for water.
  • A towel.

In case you decide to dance, you will need the following:

  • A space wide enough to move and make different movements freely and without the risk of tripping and falling.
  • Fresh and light clothes.
  • Sports or dance shoes.
  • The music of your choice.
  • A dance partner because accompanied will always be better.
  • Water to keep you hydrated.

This will be enough to perform basic exercises. But, if you want to specialize in different techniques, you will have to incorporate other additional elements.

Your benefits

Abandoning a sedentary lifestyle in old age can make the difference between a quality life and one full of aches and pains. Among the benefits of exercising in old age we find the following:

  • It provides a sense of physical and mental well-being.
  • Helps maintain an appropriate body weight.
  • It helps in the elimination of body fat.
  • It reduces the risk of suffering from different pathologies, such as heart problems, diabetes, cardiovascular accidents and high blood pressure.
  • Helps fight insomnia and stress.
  • Strengthens self-love.
  • It helps to keep blood sugar levels, lipids, etc. under control.
  • Delays memory deterioration.
  • It favors the release of endorphins.
  • Improves musculoskeletal health.
  • Helps improve balance.
  • Provides greater flexibility.

For these and many reasons it is more worthwhile to exercise during old age. You do not have to resign yourself to leading a passive life, you can make a difference by putting into practice some of the suggestions we have given you. But what things should you keep in mind when exercising?

Tips for exercising in the elderly

When choosing what exercise to do, try to make sure that its execution is simple movements, that does not require the use of much coordination and that you do not have to make very sudden changes, as this could cause you to lose your balance and end up falling or suffer gold type of injuries.

If you are going to use dumbbells, make sure that they are medium or light weight, according to your physical abilities. However, they should never be too heavy. Recognize what your limits are and try not to go beyond them. Remember that there is always the possibility of going from less to more, according to your circumstances and physical condition.

In order for you to have greater stability, the recommendation is that you wear appropriate shoes for the exercise you have chosen and, in the midst of the possibilities, you exercise standing.

If possible, do not rest the weight of your body on your hands, as you may end up injuring your wrists.

Don’t exceed 30 or 40 minutes of moderate physical activity. Otherwise, by demanding more from your body, you could end up too exhausted and sore to do other activities during the day.

In case the person has some problems related to mobility, it is best to do moderate physical exercise, at least 3 times a week, as this will help improve aspects such as flexibility, muscle strength, etc.

If you can’t do physical exercises, for some reason, don’t let the parrot go away! It is best to set aside some time for leisure activities, such as playing board games, this will help you prevent diseases related to the brain.

Remember that every activity is always much more attractive and motivating if you do it in the company of your friends. So, invite them and start exercising together today. It will surely be very beneficial and fun.

How To Do Steps

0

Experts say that to lead a healthy life it is necessary to combine at least three elements: a balanced diet, enough sleep and exercise routine.

How To Do Steps

However, the truth is that, although we know these things, we do not put them into practice for several reasons, one of them is the lack of time. Since we lead increasingly hectic lives, it’s hard to find the time to stop and do things the right way.

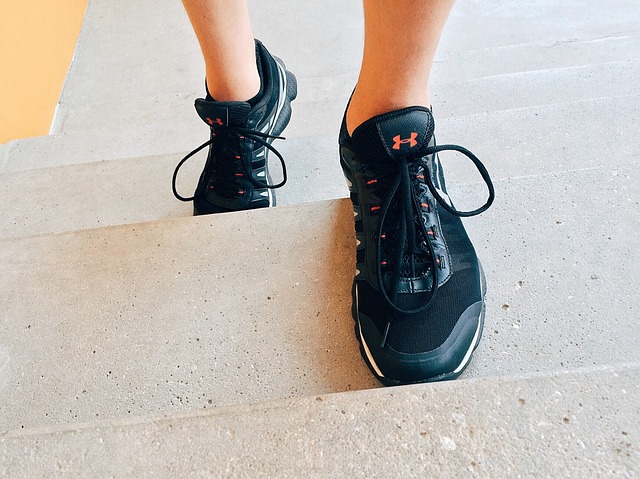
If you feel that you must lead a more active life, the solution to the problem may be the steps. It is an exercise, very simple but effective, that you can do from the tranquility of your home when it suits you.

It is a very complete exercise, where you can work at the cardiovascular and muscular level at the same time. It consists of a sequence of movements whose main base is to go up and down a rectangular platform. In fact, its name means Step and refers to the modality of work that is done.

Since there is no age needed to perform this exercise, you can do it in the company of your close friends or family. This way you will feel much more motivated to lead a healthy life, in the midst of your current circumstances.

Of course, you’re probably asking yourself some questions like: What does it take to get started? How should the exercises be done? How much time should be devoted to it? What benefits does it bring to the body? Are there any additional recommendations? If so, today is your lucky day.

Just by reading this short article you can have access to the answers to all these questions and more. So, what are you waiting for? Get down to work and start taking the necessary steps for a healthy life.

Instructions for doing steps

If you want to change your habits and lead a fitness life, start with this exercise to which you can attach many training routines. For example:

  1. The basic exercise consists of climbing the platform with one leg and then the other, and then going down on your back and following a specific rhythm, as if you were imitating the movement we do when we climb a ladder. It is best to do 3 sets of about 15 repetitions each.
  2. A different exercise involves raising one leg to the platform and then lifting the knee of the other leg. You have to do this by alternating your legs. In this case. You can also do 3 sets of 15 repetitions.
  3. If you want to tone your buttocks, it will be of great help to step with one leg and with the other simulate that you are kicking, but backwards. In other words, you should stretch your leg back. Alternate legs until completing a routine of 3 sets with 15 repetitions.

Actually, these are just some of the exercises, there are many more. The key is to perform different combinations of leg movements while going up and down the step.

A session in the gym is divided into the following parts:

  1. Warm-up: during the first 10 minutes the body is prepared to perform the work. It consists of a very simple choreography on the step, with few repetitions, which help to warm up.
  2. Aerobic work: through it you work on endurance, cardiovascular capacity and calorie burning. This part usually lasts between 30 and 40 minutes and is more complex because movements and repetitions are added.
  3. Muscle work: consists of focusing the work on the muscle groups that are in the background while giving attention to the aerobic part. That is, back, arms and abs.
  4. Stretching: these are the last minutes of the class, which are dedicated to stretching and relaxing the muscles of the body.

The choreography can be complicated until it becomes a real challenge for those who practice it.

What are its benefits?

Among the benefits we find the following:

  • Increased physical endurance.
  • Developing and improving coordination.
  • It favors the elimination of toxins thanks to sweating.
  • Improves circulation.
  • Increases the force in the lower train.
  • Increases flexibility.
  • It helps release endorphins, which helps with anxiety, depression, and stress issues.
  • Tones the muscles of the buttocks and legs by eliminating cellulite or orange peel.
  • Stimulates memory thanks to the repetition of movements.

What do you need to do steps?

If what you are looking for is to lose weight, the steps is the way to achieve it, since it has been shown that doing so you can burn calories faster than doing classic aerobics, zumba or going for a run.

To achieve this, you can practice it for at least an hour. That way the body will begin to eliminate accumulated or reserve fat. If you do it for 30 or 45 minutes, you will be able to firm your muscles and other benefits.

During a single class you can burn more than 500 calories. This amount is exceeded when you participate at an advanced level, that is, with a complex choreography and at a higher pace. So, it’s worth a try, you don’t lose anything by doing it.

Tips for doing steps

The most common are related to impact. People who have problems with joints in the knees or ankles should not practice steps. It is best to carry out activities of less impact.

It is also contraindicated in the following cases:

  • Heart problems.
  • Obesity.
  • Eye problems.
  • Retinal detachment.
  • Vertigo.
  • Pregnancy.
  • Pulmonary insufficiency.
  • Spinal injuries.

Recommendations you should take into account

In order to have a good execution and avoid injuries, before starting to practice this activity it is important that you take into account some additional recommendations:

  1. When climbing to the platform supports the entire sole of the foot. Place it in the center of the platform without protruding anywhere. Otherwise, you could lose your balance and fall or suffer an injury.
  2. Climb with smooth and rhythmic movements. Avoid stomping.
  3. When you go down, support first the tip of your foot and then your heel to protect your calf and ankle muscles.
  4. Keep your body aligned with your shoulders back.
  5. Push the movement with your whole body, without pulling forward from the hips upwards.
  6. Don’t lock your knees or contract your legs.
  7. Keep your legs semi-flexed and ready for the reaction.
  8. Do not exceed the suggested time to avoid straining the muscles of your body. Especially if you are not used to exercising or lead a very sedentary life.

It may cost you a little at first. Practicing this sport requires some time to become familiar and adapt. So don’t be discouraged. Be patient. Since you will improve as you practice it.

Drink enough water before, during, and after your workout routine to stay hydrated and not put your health at risk. The most important thing is that you enjoy it and have fun doing steps.

How To Do Aquagym

0

Do you like water sports? These are the favorite of many, since with them it is possible to exercise a large number of muscles and best of all, as the body is denser than water, it can float and thus reduce the impact on joints, such as the ankles, knees and hips, among others.

How To Do Aquagym

Moreover, it should be noted that these sports are a lot of fun. While it is true that swimming is the best known, it is not the only one that exists today. Actually, there is a wide variety of places to choose, taking into account your tastes, but also your specific needs.

One of the water activities that has gained more popularity in recent years is aquagym, also known as aquatic gymnastics. Since a series of elements are incorporated to practice it, we could say that it is a very varied activity.

Have you heard of it? Probably yes. Would you like to practice it? If so, you’ve come to the right place. In this article you will find everything you need to know about aquagym, including its description, what you need to practice it, its exercises, its benefits and contraindications.

By having this information handy, you will know if it is a viable option for you, taking into account both your background and your expectations. On the other hand, if you have not yet decided to practice it, this can be a great incentive.

You can even do it from home, if you have a pool large and deep enough to have the expected effect. With the help of an explanatory video, you can do your training routine whenever you want and at the most opportune time. But, let’s see right now what it is and how to practice it.

Instructions for doing aquagym

Aquagym is nothing more than a modality of aquatic gymnastics, which is also known as aquatic fitness. It involves performing a series of aerobic exercises, done in an aquatic environment, to the rhythm of music under the supervision and guidance of a qualified monitor.

As the name implies, it should be done inside the water with the head on the outside. It can be done in a pool or by the sea. Accessory or materials can be implemented, such as fins, foam strips, dumbbells, gloves, balls, elastic bands and even machines such as bicycles or aquatic steps.

These exercises have as main objective to exercise the muscles. However, they also manage to increase the endurance and strength of the body. In addition, when performed in the water, it stimulates cardiovascular activity, since it merits constant movements.

There are different modalities of aquagym, which vary depending on the exercises performed and the resistance of each person. In addition, aquagym is also divided into levels.

Its basic level only lasts about 30 minutes and its purpose is to improve or correct posture. The intermediate level lasts 40 to 45 minutes and includes exercises with a higher level of difficulty executed with more speed. As for the advanced level, the resistance must be equal to or greater than 45 minutes and the movements are perfected through choreographies.

What do you need to do aquagym?

  • Aerobics: They are performed in order to increase the heart rate, as well as stimulate the production of oxygen. This favors the activity of the heart, lungs and blood vessels. Especially when practiced with a moderate intensity. Some of these exercises are walking and running, but also swimming and cycling, which can also be done with aquagym.
  • Those of resistance or strength: these exercises are those that are performed with the aim of improving posture and toning muscles. These movements are made before an object that offers resistance, such as water. This resistance causes the muscles to become stronger and acquire a specific shape.
  • Those of flexibility: are the exercises that are responsible for stimulating muscle elasticity. This helps to keep the joints in good condition, while reducing the risk of suffering some type of injury, improving posture, breathing and muscle strength.

For this and much more, aquagym is an excellent sport for all types of people, but especially for people with muscle or joint problems, as well as for those who must perform some type of rehabilitation.

On the other hand, it is a sport that can be practiced by those who have little physical conditionpregnant women, the elderly or overweight.

If you want to practice aquagym, you need to know what its benefits are. Knowing this will end up motivating you to want to try, if possible, right now.

Tips for doing aquagym

  1. Since in the water your weight is reduced between 80 and 90%, this sport becomes a low impact one. That is, your body does not suffer and any possibility of suffering some type of injury is considerably diminished.
  2. It is ideal for those who suffer from back problems, joint pain, sclerosis or any other ailment in the extremities, especially in the legs.
  3. It is considered one of the best allies for those who wish to model their figure. Since these are low-impact exercises and your body weight is reduced, when performing simple exercises, your muscles work with greater intensity, even if you do not realize it.
  4. Thanks to aquagym you can improve your silhouette, tone the chest and buttocks, refine the abs, etc. In addition, it allows you to burn at least 600 calories in just 30 minutes of exercise, the same as you would burn in an hour and a half on dry land.
  5. Moreover, water movements have a positive impact on the skin. They apply a massage that helps stimulate circulation and, therefore, reduce fluid retention and the much hated cellulite or orange peel.
  6. However, in addition to improving your musculature, it also helps you stimulate your cardiovascular rhythm, improve blood circulation and respiratory tone.
  7. It brings great benefits to mental health, since, after practicing it, it leaves a relaxing effect and a feeling of lightness. Also, since it causes the segregation of endorphins, it generates a feeling of well-being and pleasure.
  8. In addition, because it is a collective sport, it gives you the opportunity to interact with others and have a pleasant and fun time.
  9. Anyone can practice it, no matter what their physical condition, age, sex or weight. In fact, it is highly recommended for pregnant women who suffer from muscle aches.
  10. It is not necessary that you know how to swim, since to practice it, you must be standing and, therefore, it takes place in the shallower part of the pool.
  11. Since you’re in the water, your body doesn’t overheat, which makes you sweat less and feel less fatigued and exhausted.
  12. The different elements that make it up, such as music, teammates, coach, materials and the exercises themselves, make aquagym a very fun sport.
  13. It is an excellent sport for the summer season, since you can exercise without having to suffer or deal with inclement weather.
  14. Since water makes the body more resistant, the joints increase their range of motion, which implies that the flexibility of the body is increased.

As you have been able to realize, aquagym is very beneficial for your health. Therefore, it is one of the most recommended by experts in the field. However, before you decide to practice it or not, it is important that you know both sides of the coin and be aware of what their contraindications are.

Some contraindications

Since it is not a risk-free sport, so that you can enjoy the experience as much as possible, it is important that you know what its limitations are.

Some of its disadvantages have to do with the point of view of practicality. For example, it cannot be practiced if you do not have access to a swimming pool or, failing that, to the sea. Moreover, in addition to paying for classes, in most cases it is necessary to cancel the membership that gives access to the training place.

It is also necessary to have personnel that is highly qualified so that the training is adequate and of quality.

In addition, aquagym is a sport where there is a considerable expenditure of energy, in fact, one greater than that generated by other types of sport, despite the fact that its exercises are slower.

In case you suffer from a specific disease or have a health problem, it is always recommended that you consult with a specialist before performing any type of physical activity, no matter what it is.

Despite the above, there are many more advantages than disadvantages. Therefore, what are you waiting for to start practicing aquagym? Search the Internet for the closest places to your home to practice it or, if you have a pool at home, find out if there are possibilities of receiving classes online.

No matter what the case, don’t forget to invite a couple of friends or family. This will make the experience much better, more fun, pleasurable and stimulating.

Keep in mind that, if your purpose is to lose weight, for you to obtain better results, you must accompany the exercises with a balanced diet and adequate water consumption.

If you take into account these recommendations, you can get visible results in a very short time, while enjoying the pleasant experience of practicing aquagym.

How To Define the Forearms

0

The human body is a true wonder of creation. Each of its parts is perfectly made and has a function. It is not there as a product of chance, but it has a purpose.

How To Define The Forearms

In fact, each part is closely related to the other members of the body, such as fingers, hands, forearms, arms, etc.

While it is true that we can continue to live without a member of the body, the quality of life would not be the same, since each part is necessary, complementary and works in perfect harmony with the rest of the body. Hence the need to take great care of ourselves by being governed by a healthy diet and an appropriate and balanced exercise routine.

In this sense, balance is very important, since we usually give more attention to certain areas of our body, such as the buttocks, chest and abdomen to relate them to today’s beauty standards.

This has resulted in us stopping training certain equally important parts of the body, such as the forearms. This is one of the most forgotten body members. However, the truth is that it depends on them that we have a better grip, which will help us perform different types of tasks more efficiently.

If you like to train your body, you will surely want to know how you can define the forearms. This time we will be sharing with you some strategies that will help you achieve it, whether you go to the gym or not. The idea is that you can count on a perfectly defined body, because the disproportion is usually noticeable to the eyes.

Pay close attention to the following recommendations and be sure to follow them to the letter. Soon, you will begin to see favorable results that will leave you satisfied.

Instructions for defining forearms

As mentioned above, the forearms are usually the muscles that are least directly trained. However, this is a serious mistake, since in multiple exercises it is necessary to use the external auxiliary elements to provide a good grip.

The muscle groups of the forearms are constituted by the anterior, posterior and lateral compartments, which are responsible for the different movements that the hand and the arm itself can perform. For example, flexion of the fingers, elbow joint, wrist, etc.

However, in broad strokes, we can say that the set formed by the elbow and forearm fulfills two different functions that we use constantly, consciously or unconsciously.

These functions are:

  • Flexion and extension of the elbow. It is responsible for changing the functional length of the arm and modifies the distance between the hands and the rest of the body. The humero-ulnar and humero-radial are the joints responsible for providing this movement.
  • Supination and pronation of the forearm. These are the joints between the radius and ulna, which allow the palm to rotate up and down without the elbow joint moving.

Now, in view of their importance, how can we train the forearms to strengthen and define them well? Following the following training routine:

Towel pull-ups

This is a variant of the traditional pull-ups, which adds a certain degree of difficulty. In this case, the muscular area of support is the one that will be responsible for supporting all the weight of our body. To do this, wrap two towels around a fixed bar. Then, grab in each hand and push yourself up while keeping your chest up and shoulders down.

It is necessary that you tighten the towel very well so that you can stand and tighten even more to get up from the ground. Therefore, it is not surprising that in your first attempt you do not manage to perform many repetitions.

If you think it is a very complicated or demanding exercise, you can start by grabbing the towel with one hand and with the other grab the fixed bar. Then, alternate your arm.

If you make an effort to practice this exercise, you will notice a great change in your grip strength and in the development of the size and shape of the forearm.

Forearm curl with bar and one han

Ideally, you should do this exercise with the help of an Olympic barbell due to its weight and length. The purpose is to try to make the curls maintaining balance at all times, that is, that the bar does not tilt either to the right or to the left. The effort we make with the forearm will depend on it.

While it may seem that you are doing bicep curl, and although it is, we will also be exercising your forearms. You can perform 3 sets of 15 repetitions each per arm.

Farmer’s Cargo

If your goal is to get a strong grip and defined forearms, this is a fundamental exercise. Also, this exercise will help you develop a strong abdomen and improves the stability of the shoulders.

To do this, take a dumbbell, which is heavy enough, in each hand. Stand up with your legs straight and start walking.

While you’re at it, keep your abdomen tight, your chest out, and your shoulders back. Maintain that posture at all times.

Doing this exercise will also serve as a warm-up, in order to stimulate the stability of the body in general.

What do you need to be able to carry out these definition exercises for the forearms? We’ll be looking at it right now.

What do you need to define the forearms?

In order to perform an efficient exercise routine, it is necessary that you have the following elements:

  •  Sportswear that is comfortable. Although it may seem insignificant, it will depend on whether you can efficiently perform certain movements related to the exercises and avoid injuries due to lack of good mobility.
  •  Appropriate footwear. Footwear is equally important, because it has a good grip will depend on your stability when exercising. A bad movement can lead to injuries.
  •  Weights and dumbbells. These will help you develop and define more easily the muscles located in the forearm area.
  •  A towel. Not only to dry your sweat, but also to be able to do the pull-ups.
  •  A stable bar on which you can suspend comfortably and without fear of falling to the ground.
  •  Being well hydrated is very important. Especially when the body is subjected to intense physical activity. Monitoring this aspect will make you perform better and prevent fatigue.
  •  Good music and company to keep you super motivated.

Due to the Covid-19 pandemic and other reasons, some cannot go to the gym to train. If so, what can you do? Pay close attention to the following recommendations.

Tips for defining forearms

Although in the gym you have a lot of elements that will allow you to exercise and define your forearms more quickly, you can also achieve it while at home, how? Doing these exercises:

  1. Wrist push-ups. Although it is true that there are many exercises of this type, the recommendation is that you start with the most basic to avoid suffering some type of injury or ailments.
  2. Stand leaning against a front wall. Then, push with your fingertips, trying to move a little away from the wall. This exercise will make your wrists move again and again, managing to activate the muscles present in the forearm and activating the blood supply.
  3. As you master this exercise, you can increase the difficulty by doing more repetitions or increase the incline by leaning on lower walls or tables to make the most of the weight of the body.
  4. Lifting a chair. To do this exercise correctly, lie on your stomach while keeping your arms extended over your head. Then, grab a chair by the front legs and try to lift it off the ground as much as possible.
  5. When you get used to this movement, your arms will be stronger. To avoid suffering any injury to the wrist or in the most distal area of the forearm, the recommendation is that you start using chairs that are lightweight.
  6. Dumbbell exercises. These are the basic exercises to define the forearms. However, we do not always have some. In this case, it is to replace them with other objects, such as plastic bottles filled with water or sand.
  7. In order to perform these exercises, you must also have a table, or other support area, which is at chest height. While in this support, extend your arms with the palm of your hands facing up while holding a dumbbell in each hand.
  8. This type of training is very important to get a strong grip and to improve the appearance of the forearms. However, you must be balanced in this regard. It will be enough for you to exercise them about 2 or 3 times a week. In fact, it is ideal.
  9. On the other hand, these exercises should be combined with a series of isometric exercises and wrist push-ups.

If you follow these recommendations to the letter in a very short time you will see the results, a perfectly defined and symmetrical body, ideal to wear during summer days on the beach.

Naturally, defining forearms is not a job that will be accomplished overnight. But, if you are disciplined and try hard enough, you will achieve your goal in less than you can imagine. So, what are you waiting for to start your forearm training? Today is the best day to do so.

How To Define Buttocks by Doing Yoga

0

In this world there are many contradictions. For example, there are those who say they love someone, but are unfaithful, those who beat their children so that they stop crying, those who value what they have already lost and those who want to have a perfect body without making the slightest sacrifice.

How To Define Buttocks By Doing Yoga

Although the latter may seem laughable, the truth is that more and more people dream of having the perfect body, the one that is worthy of the cover of a magazine, but do not even want to move a finger to get it.

Something you should keep in mind is that miracles do not exist and that you are unlikely to get something just by wanting it. It is always necessary to do something to achieve it. So, if you want to achieve positive changes in your body, you must do something about it, whether it is diet or exercise or a combination of both.

Now, there are different alternatives, some more attractive than others, to exercise. For example, dancing, tai chi, yoga, etc. Maybe you like to do some of these activities and you have not realized that they can also be useful to get the body you want.

For example, did you know that doing yoga can help you define your buttocks? Yes, there are different yoga positions that will help you lift it, define it, harden it and make it look its best.

Throughout this article we will be telling you everything you need to know in relation to how to define your buttocks doing yoga. For some it may seem that it is too passive an activity to give results. But the truth is that it contains several positions that require a certain degree of physical effort and, therefore, give very good results. Let’s see.

Instructions for defining buttocks doing yoga

Most activities in modern society lead you to spend long hours sitting, which causes your buttocks to stay asleep most of the time. Now, to start strengthening them, you need to stretch them to eliminate the feeling of stiffness.

The buttocks are made up of three main muscles which are the gluteus maximus, the middle and the minimum. While it is true that genetics plays a fundamental role in terms of size and shape, some yoga postures will help you make your buttocks healthy, strong and firm. But what are they?

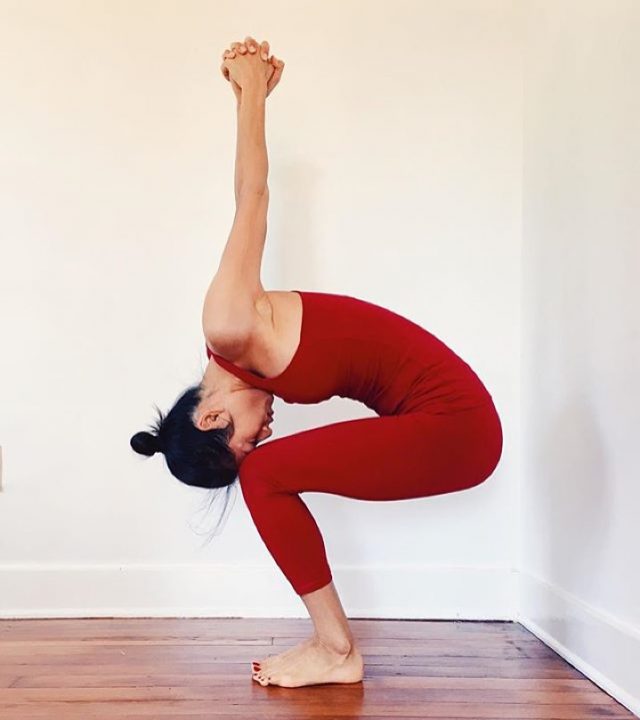
Utkatasana with inverted head

To perform this pose, your back should curve while lowering your head forward until your forehead touches your knees.

In relation to the arms, these should go behind the back and stay straight, stretched upwards with the hands intertwined.

This position will not only help you effectively work your buttocks and legs, but it will also contribute to the stretching of your back. Hold this position for about 30 seconds and that will be enough.

The posture of the sun

The first thing you should do is sit with your back straight and your legs stretched and together. Then, bend your knees a little in order to rest the soles of your feet on the floor.

While you do this, inhale and, when expelling the air, force with your arms and legs until you raise your hips as much as possible.

In relation to the arms, they should always be upright. Drop your head back and keep your gaze fixed on the ceiling. Try to endure in this position at least a minute, in order to achieve the expected results.

The posture of the bridge

Lie on your back on a mat or rug. Then, bend your legs and keep them a little apart by supporting the soles of your feet.

The arms should go under the back fully stretched, with the hands intertwined. Raise your hips as much as you can and, so as not to fall, squeeze your buttocks tightly. Hold this same position for about 30 seconds.

The bridge with the leg extended

This is nothing more than a variant of the previous position. It is done practically the same, only that, this time, once you have your hips raised, you should be able to stretch one leg and keep it straight, while with your toes you point upwards.

Hold for a space of 30 seconds and rest. It is ideal to perform it after the previous posture.

Flying posture

To do this, stand up and separate your legs according to the width of your hips. Then, lower the trunk to the front, while keeping your back straight. Stretch one leg and place your arms straight with the palms of your hands facing each other.

Then, squeeze your buttocks and abdomen tightly, and hold this position for about 30 seconds. Then, alternate the other leg following the same instructions.

Extended lateral angle

Stand with your legs sideways apart, a little beyond the width of your hips. The next move will be to turn the right foot about 90 degrees outward, while the left remains in a straight line.

Breathe and place your arms in a cross shape with the palms of your hands down, bending your right knee to a 90-degree angle that goes from the thigh to the leg.

Then, with your left leg straight, expel the air and bring your elbow over your right knee, at the same time as your left hand on your hip. Then, stretch your left arm and lower your right hand supporting it next to foot. It supports this same position for about 30 seconds and then changes sides.

The posture of the chair

To perform this pose, stand up by raising your arms straight and well stretched. Bend your knees as if you were going to perform a squat, making sure they do not exceed your feet.

Then, lower your body and keep your back straight while throwing your shoulders back. As for the thighs, these should form an angle of 90 degrees. Being in that position, keep your buttocks and quadriceps firm and stare at the same point. Hold this position for about 30 seconds and rest.

Since you already know what are the movements and postures that will help you define your buttocks, the question arises: what does it take to do yoga?

What do you need to define buttocks doing yoga?

One of the great advantages of yoga is that you do not need many elements to be able to do it. In fact, you can find them easily and simply, without having to leave your home.

  •  The first thing you need is a yoga mat on which to perch to perform the different movements. In case you do not have one, you can replace it with blankets and pillows placed depending on our level.
  •  Comfortable, breathable and loose clothing, in the case of beginners. As you increase in level and increase the levels of difficulty, it may be necessary to wear tighter clothes so that it does not hinder you in relation to the respiratory objectives you have set.
  •  An open space. This will give you the opportunity to stretch enough or turn without fear of tripping or hitting any object or furniture.
  •  Of course, it is also important that the space is quiet, that there are no noises or distractions so that you can concentrate completely.
  •  No matter what your level of flexibility, blocks are necessary for proper alignment. They are recommended in the case of practicing push-ups with a higher degree of demand.
  •  You can find blocks of different sizes and materials. For example, foam, cork and wood.
  •  Sandbags. These are used to accentuate stretching. For example, place one on your stomach so that you have greater awareness of your abdominal muscles at the time of breathing.
  •  You can also use them to support or lift some parts of your body. If you do not have this, you can use bags full of rice, beans, grams of corn, etc. Something to help you get a regular weight.

In addition to the above, what other recommendations will be useful when doing yoga to define the buttocks?

Tips for defining buttocks by doing yoga

To obtain good results, in relation to the definition of the buttocks, it is important that you focus on the quality of the exercises.

If you have little time to exercise, instead of doing a lot of careless repetitions, do a few, but well done. That is, stretching the limbs well, squeezing the buttocks and abdomen, breathing correctly, taking care of balance and good posture, etc. Take your time. In the particular case of yoga, sometimes less is more.

When breathing, always do it through the nose and very slowly. Notice how your lungs fill with air. Take advantage of these circumstances to stop and think about the simple things in life, so that you get the exact point of relaxation.

Wait for your breathing to normalize as you move from one posture to another. Usually, only one or two minutes is enough.

If the pose you are doing is with one leg open to the right, when finished, try it with the left. The goal is that you can exercise each part of your body in a balanced way, in this case, the buttocks.

Finally, although in yoga you enjoy silence, you can also choose soft music in the background. If you prefer, play a recording with sounds typical of nature, such as running water, the breeze between the trees or the chirping of birds so you can relax.