Home Blog Page 5

How To Exercise with My Dog

0

Surely you love your dog so much that you consider him a member of the family, your best friend, or even much more. The love that our dogs give is countless and we want to take care of them as best as possible, that includes physical exercise.

How To Exercise with My Dog

Dogs need exercise, some more than others (it depends on the breed and the energy they have). It is necessary to take our dogs out at least three times a day, but they also need some physical exercise to calm the extra energy they have and also to stay in shape.

So, you can take advantage of the time and get fit together with your dog and also have fun together. You will have great times together and your union will also become much stronger. Now we’ll show you how to exercise with your dog.

Instructions for Exercising with My Dog

  1. Normally, when you think about exercising with a dog, you think that running or walking a route is enough, but keep in mind that some dogs are better prepared to run than others. So, choosing what type of exercise you are going to do together will depend on the one that best suits you and your dog’s ability.
  2. A good way to exercise, especially in hot weather, is to go swimming, especially if your dog is not afraid of water and likes to swim. You can go to a river or lake where you can’t disturb people who don’t like to bathe with animals. You can run, swim from one point to another, be imaginative! Be careful and always keep an eye on your dog, it may get tired or he may swallow water and start choking.
  3. Another good idea is to do obstacle tests. You can set up an obstacle course that involves zigzagging races, jumping benches, going under tunnels, etc. These obstacles can be put up by you or you can take advantage of what nature gives you. It is a good way to exercise all the muscles since you will be able to run, jump, bend, crawl, etc. and it will also improve your dog’s obedience and force him to think. Don’t forget that you should also do the tour together with your doggy friend.
  • If your dog already knows how to stay by your side and doesn’t run around without obeying, you can ride a bike and have your dog run by your side. Cycling is another great sport to work numerous muscles and stay in shape. If your dog is still not used to running next to your bike, try to keep him on a bike and go slowly.
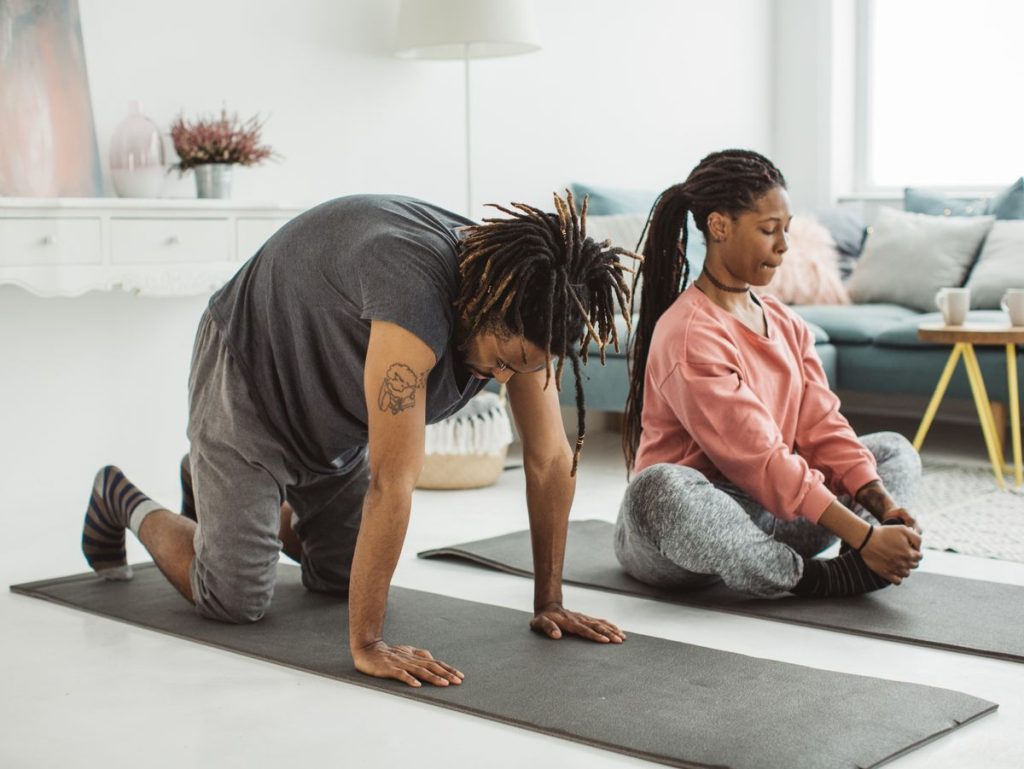
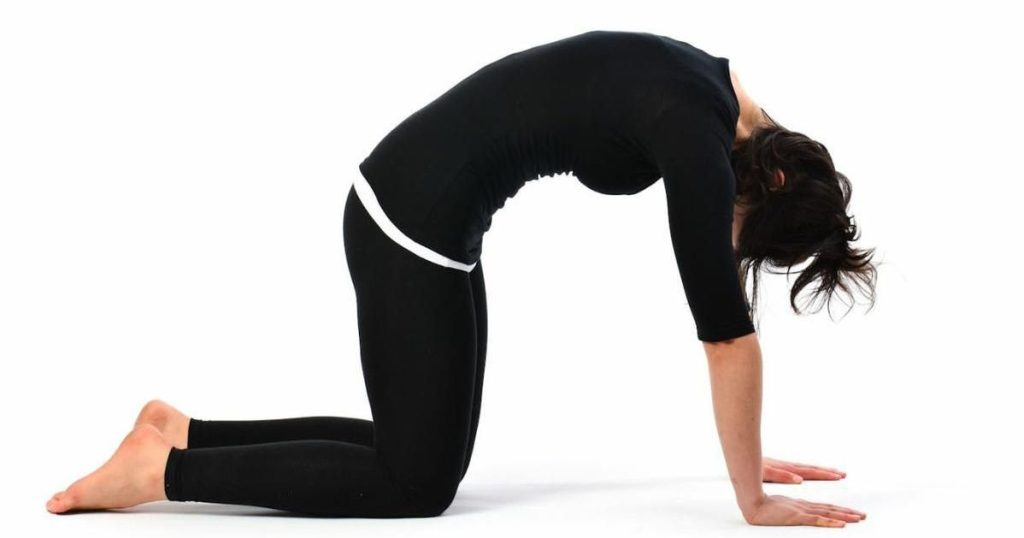
  • Did you know that a new way of doing yoga has been developed? Yes, it’s called Doga and it’s all about practicing yoga with your dog. It’s perfect for calming and relaxing your friend or for quiet dogs who aren’t passionate about running or strenuous exercise. If there are no classes to attend in your city, look for books or look online for some yoga exercises to do together.
  • There are also some games with which to have fun and also exercise at the same time: Among these exercises you can teach your dog to obey you and follow different commands, such as sitting, standing when he should, getting on two legs, lying down, coming when commanded, etc.
  • Once he has learned to obey these basic commands, go a step further and teach him to turn, to make a sequence of movements and commands, to play hide-and-seek, etc.
  • A very fun and educational activity that you can do with your dog is to be next to each other, take two steps and see if your dog takes them too. If they don’t listen to you, try saying their name first. If your dog doesn’t stand and doesn’t take the same steps as you, go back to the starting position and repeat. When you take two steps, the number of steps changes. Stand up, tell him to sit down and then take about 4 steps and wait to see how many steps your dog walks.
  • Remember that when you try to teach your dog and you want to get him to obey you, you should reward your dog every time he does well, and don’t scold him or hit him when he does it wrong, instead tell him that you will try again.
    If your dog is bored and tired of playing, try changing the game, but if he doesn’t pay attention and continues in the same attitude, let him rest and continue the next day.

What do you need to exercise with my dog?

  •  Dog
  •  Park
  •  Bicycle
  •  Canine treats or treats

Tips for exercising with my dog

  • Keep in mind that your dog can’t tell you as clearly as a human that the exercise is too strenuous, or that they’re really exhausted, so you need to be careful and keep an eye out for your dog so that nothing happens to him.
  • Establish an exercise routine and schedule so your dog knows when it’s time to exercise and when you’re just going for a walk.

How To Exercise at Home

0

In this hot season, we know that exercising at home is a good option to get some muscle mass.

How To Exercise At Home

Now many of you will go on vacation, therefore, it may be that you cannot go to a gym on a regular basis, since you may go somewhere that does not have a gym or that the monthly fee is too expensive.

In addition, you are not going to pay a gym fee of only one week, as it is usually much more expensive in proportion per day than in a regular monthly fee.

Exercising at home is not as effective as good weight training, but it does help you achieve a little muscle mass and maintain muscle mass during a holiday period as we have already explained.

This article may also be ideal for people between the ages of 12 and 16, who are still too young to start weight training, but can already start gaining some muscle.

This routine does not stunt growth andcan help in the generation of strength in preteens, so it is a good option to start doing the first anaerobic exercises. Then when they join the gym, they’re going to start with a little more strength than other people who have never trained.

The routine for exercising at home that I have prepared for you has a low difficulty, suitable for all ages, without any kind of extraordinary cost and for all types of training levels, whether beginners or experts.

I offer you all this from the doncomos.co m exercise section, a section that offers you all kinds of exercises and sports suitable for the whole family. Pay close attention from now on, as this routine is going to get you in shape.

What do you need to exercise at home?

  •  A couple of plastic bottles (jugs if you have the strength).

Instructions for exercising at home

  1. Push-ups:
    Push-ups are a basic type of exercise that can be done anywhere. This type of exercise is suitable for all levels, and all people with average strength can do it without problems. Push-ups are performed as follows: First, we must lie on our stomachs and hold on with our arms stretched shoulder-width apart. Second, we will go down to the bottom by bending our arms until they touch the ground with our chin, to go back up. You should keep in mind that you should keep your back completely straight and go down with only your arms, without doing weird things. If you can’t do push-ups due to strength, start by resting your knees on the floor so that it costs less. Push-ups are always done until muscle failure, that is, doing until you can’t take it anymore, trying to beat your own record each time.
  2. Abdominals:
    Abdominal exercises are very good for having strength in the core of the body, which makes us have a stable body to be able to exercise, in addition to helping us mark the chocolate bar (as long as we have a low percentage of body fat). The way of doing sit-ups that we are going to do is the traditional way, that is, first of all, we are going to lie on our back, with our knees bent and our hands on our head. Second, we’re going to go up with the abs halfway up, keeping the neck straight and letting the tension go through the abs, not the lower back. Do 20 repetitions until you can do more without pain.
  3. Shoulder with bottles:
    Now let’s use a little imagination by making some homemade dumbbells. To do this, we will only need a couple of bottles full of two-liter water to start, as it is light. When we start to have some strength, we are going to move on to larger and larger bottles, with a maximum of 8 liters per bottle (each liter weighs 1 kilo). The way to do this shoulder exercise is to do the lateral raises exercise, that is, we will start by putting the arms together at the width of the abdominals, and then go up making a wing shape (birds), to go back down. Feel the tension in your shoulders, not your back or arms.
  4. Biceps with bottles:
    We’re going to take our bottles/dumbbells and we’re going to do the exercise you like the most, i.e., the biceps. We’re going to do the classic biceps curl exercise with dumbbells that I’m sure you already know how to do, but I’m going to explain a little bit how it goes. First, let’s grab the bottles with our arms stretched down. Second, we’re going to contract our arms upwards, doing it in a gentle way, without arching our back or contracting our shoulders. It is done by climbing explosively, but without sacrificing technique, noticing how it pulls the biceps.

How To Equip Myself to Go to The Gym

0

In the event that we have made the decision to start doing physical exercise, either to improve our physical condition, for a health issue, or because we have started to do a diet, etc., a great doubt always arises when we are about to start. We usually wonder what we should carry in our backpack so that we don’t miss anything at that precise moment. That’s why today in doncomos.com we’re going to show you how you should equip yourself to go to the gym. Come on, let’s get started!

How To Equip Myself To Go To The Gym

What do you need to equip me to go to the gym?

  •  Sportswear
  •  Towel to place on gym equipment
  •  Bottle of water
  •  Towel for bathing
  •  Soap
  •  Shampoo
  •  Clean clothes
  •  Flip flops

Instructions for Gearing Up for the Gym

  1. If the activity we do is inside a gym where we work with equipment, we will need sportswear. It should not be warm clothes since we will surely not go outside, so it would be best to use shorts, a t-shirt, sneakers, socks and in case you think it is necessary a tape to retain all the sweat on your head. Long hair: it will be essential to put a scrunchie in your hair, you can do an updo to prevent the hair from going to your face.
  2. A fundamental element that we must use when we go to the gym is a towel, because in almost all these places it is mandatory to carry it, and it is also advisable to have it, since it will allow you to use it for when you are on the machines and equipment and in this way, they do not get stained. We can also use it to clean some debris that we have left in the place.
  3. Another very important element to take to the gym will be an electronic device such as an mp3 to an mp4, where we can listen to music or watch videos. In this way, our stay in the gym will be more pleasant and time will pass faster, and we will also be able to last longer exercising. In the case of not having one, we should not worry because there are always people who do not have one and therefore it will be the right time to start a conversation with those people. Socializing in these types of places is very good and makes us look forward to going to the gym.
  4. Another very necessary element when we go to the gym is to carry a bottle of water, this way we can hydrate while we are exercising, refresh ourselves and continue our activity with more strength. It is necessary to know that we do not have to take long sips of the water when we have finished exercising, but rather it is necessary to wet our lips with the water.
  5. Many people prefer to bathe when they get home but to avoid getting sick due to perspiration when leaving the gym, it is necessary and convenient to bathe in the facilities, so we advise you to carry in your backpack another towel to dry off, gel and shampoo to bathe. You can also bring a comb and the clothes you will wear after bathing.
  6. It is important that you also carry flip-flops in your bag since being a public place you may see fungi or dirt on the floor of the locker room. It is essential that you bring bags to put your dirty clothes and sneakers.
  7. Once you’re equipped, we advise you to stop by our fitness category to learn some useful tips

Tips to equip myself to go to the gym

Generally, people who go to the gym usually do not carry a cell phone or money to prevent them from getting lost, but you should know that it is essential to carry it because you will spend an hour or two in there and you may have an emergency. So that it doesn’t bother you in your pants, you can store them inside your backpack.

How To Do Yoga at Home

0

When we say yoga, we are referring to a discipline in which we resort to techniques of movement and concentration that unite our mind with our body to reach a state of relaxation.

How To Do Yoga at Home

Some use yoga as a quasi-religious doctrine, but nowadays with the expansion of this practice, it tends to be done more as an exercise to relax the body and mind.

Starting to do yoga at home helps us in many ways, we can stretch all our vertebrae thanks to its movements, relax all our muscles, massage all our organs, so doing yoga at home helps us to have a better physical condition and optimal health.

Doing yoga helps us to avoid atrophy in our body and to relax completely, maintaining a better cardiopulmonary rhythm, good muscle condition, elasticity, better intestinal transit, reducing problems such as dysmenorrhea and having more fluid and relaxed periods, reducing pain during childbirth, detoxifying, reducing the level of stress and many more benefits.

If you have decided to start doing yoga at home, all you need is perseverance, discipline, and enthusiasm to be part of this practice.

Check out these instructions to understand how to do yoga at home. It’s time to start doing yoga at home.

What do you need to do yoga at home?

  •  Use a workout mat

Instructions for doing yoga at home

  1. Start by understanding the basic principles of yoga. To do yoga at home, all you need to do is focus on it. The main basis of this practice is emotional tranquility, you can’t do yoga well if you spend your time thinking about other problems or situations in your life, relax and dedicate yourself to practicing yoga.
  2. You will need comfortable clothes, sweatpants, leggings, lycra, or boxers will be enough to do yoga. The important thing is that your clothes are comfortable and you can move around in them without any problem.
  3. You can accompany your yoga sessions with music or relaxing sounds such as birds or running water, for this you just have to use your computer, or practice in your garden or in a room where you can open the windows so that the birds can be heard.
  4. Choose the type of yoga you’re going to practice. There are several types of yoga, some styles are dedicated to mental relaxation, meditation, also, yoga as physical therapy for muscle relaxation and to acquire elasticity.
  5. The place where we go to do yoga should be a quiet place, preferably where there are no noises such as traffic, television programs, or arguments, as these could put you in tension.
  6. Think about how many yoga sessions you’re going to do per week. To achieve optimal results, it is ideal to do at least 4 sessions per week, but you can do yoga every day. The only important thing is to have at least one free hour a day to dedicate to this and thus get results.
  7. Even though yoga doesn’t actually burn a lot of calories, it’s important that you stay hydrated at all times. Doing any kind of exercise while our body is dehydrated will fatigue us and make us feel sick.

What do you need to do yoga at home?

  •  Use a workout mat

How To Do Push-Ups

0

Push-ups are a type of exercise with which we improve our arms and chest. It consists of lifting the body only with the help of the arms. We have to be upside down and in an inclined position to be able to do this.

How To Do Push-Ups

Push-ups are also known as push-ups, push-ups, shoulder push-ups, push-ups and even push-ups. The specific muscles that we exercise with the help of this physical activity are the triceps, deltoids, serratus anterior, abdomen and oblique and pectorals. In addition, it helps us define our arms and legs, lose weight and build muscle mass

Push-ups are used in many physical tests to access positions such as police and firefighter. They are also used as punishment in some areas, for example in the army.

There are different variations of this type of exercise. Here are some of them:

  • Wall push-ups. They consist of flexing the body by resting it against a wall. The farther away our feet are from it, the more effective our push-ups will be.
  • Push-ups with a handclap. A variation that can only be practiced by specialists. It consists of clapping your hands in the air before you finish flexing your arms to get closer to the ground. Very good for working the chest.
  • Clenched fist push-ups, which protect the wrists from possible injuries since they remain in a neutral position throughout the process. They are perfect for the pectorals.
  • Declined push-ups. They consist of placing the legs on a stable elevated surface. In this way, the work is mainly focused on the upper part of the pectoral.
  • Push-ups with diamond-shaped arms. They are perfect for exercising the triceps, men, and upper back. They require a good physical level so they are not recommended for beginners. You have to place your hands creating a diamond with the index finger and thumb of each of them. You should place them under your chest and descend as usual. The alignment of the shoulder will not be the same as in simple push-ups.

Is push-ups hard to do?

In general, no, but it is true that it requires a good physical shape to perform them correctly. They are easier to perform by those who have good muscles in their arms and back. As women tend to have less developed these muscles, it is usually an easier exercise for men, but only initially. Performing push-ups on a regular basis shapes the body and prepares it.

One of the biggest problems when doing these push-ups is not positioning the body correctly. To get effective results and know how to do it, you just need to read the following post. Let’s get started!

What do you need to do push-ups?

To do push-ups we’re going to need

  •  Sufficient floor space
  •  A pilates mat or a good mat to exercise on
  •  Comfortable sportswear
  •  Sports Shoes
  •  Patience, especially in the first few weeks. Don’t throw in the towel even if it costs you, I assure you that the results are spectacular.

Instructions for doing push-ups

Step-by-step to do simple push-ups

  1. Position your limbs correctly. Lie face down on the floor and kneel. Next, extend your arms and place your palms flat on the floor. The opening of your arms should be equal to the width of your shoulders. Once your arms are perfectly aligned, extend your legs and rest them on the floor with only the balls of your feet. Both feet should be kept together and the head should be facing forward.
  2. Keep your body straight. Your hip should be in line with your back. It can be neither higher nor too low. It should descend perfectly straight to the legs. The hip and back position is one of the most common mistakes beginners make. Be careful with this, as maintaining an incorrect alignment will worsen the exercise and the benefits it could have on your body.
  3. Align your neck with the rest of your back. Don’t leave it down, or force it up. Think about the shape of the spine and try to make the neck follow it naturally, don’t force it to maintain a position that is not correct. The gaze has to be in front and the neck perfectly aligned. If you don’t do it right, you will suffer from pains in this area for several days. You could even get injured.
  4. It’s time to start flexing. Do this from your elbow. Try to have both elbows bend in unison and maintain a straight position with respect to your neck and shoulders, as if following an invisible line. You must lower them as much as your strength allows. The closer they get to the ground, the deeper the push-ups will be and the greater the advantages of this exercise. The movement of your elbows will also mean that your torso will be brought closer to the ground.
  5. Don’t forget the breaths. Inhale when you’re flexing and exhale when you’re climbing.

Tips for doing push-ups

Councils

  • When practicing push-ups, avoid curving your lower back as you descend and ascend. The only thing you will achieve is to recharge the muscles in this area. Be careful, because you could get injured.
  • Don’t forget to keep your eyes straight ahead and your neck aligned with the rest of your spine.
  • Avoid sudden movements when you stretch your arms to get back up. You could end up injuring your elbow because of this action.
  • It’s an ideal exercise to keep fit all year round, especially on vacation if you’re not near the gym.

Here are these articles that will surely be useful to you

  • How to Get Perfect Abs
  • How to Tone Your Arms Without Going to the Gym
  • Easy Exercises to Lose Belly and Chest Fat

Training plan to exercise our pectorals

As we know that the easiest way to learn in this life is by practicing, we propose a very easy push-up table so that you can start exercising starting from a basic level. You can do it at home during your free time while watching TV before bed, or just when you wake up to go to work. If you do these exercises regularly, you will be able to tone your body, be fitter and achieve spectacular results.

Perform 4 sets of each exercise with a maximum of 12 repetitions. Increasing the repetitions would not serve our purposes, which is to strengthen the pecs, but to improve endurance. The problem is that if you do a higher number you can end up damaging the muscles. A maximum of 12 repetitions is always recommended for muscle work. The number of sets varies depending on the exercise you do. In this case, it will be 12 for each exercise.

Remember not to do push-ups if you’ve done strength training before. It would be useless and you could injure yourself.

  • Exercise 1: Simple push-ups. These are the ones we have explained in the step-by-step. Remember: body stretched out, back and neck straight, gaze straight ahead, legs together, feet resting on the tips of the fingers, and arms open at shoulder width. We have to perform 4 sets. When we finish them, rest for about a minute and continue with exercise 2.
  • Exercise 2: Knee bends. One more variety of simple flex. They are also known as light push-ups. They are ideal for people who are not used to this type of exercise and do not have much strength in their arms. The body must maintain the same position as in simple push-ups. The only difference is that we will rest on our knees instead of on the balls of our feet. Again, we will do 4 sets of 12 repetitions and rest for a minute before starting with the next exercise.
  • Exercise 3: Simple push-ups. We will repeat the same ones we had done during exercise 1. Be careful, because as we will start to feel a little more tired. We may neglect our posture. Don’t forget to stand straight and well aligned so that your back and muscles don’t suffer.
  • Exercise 4: We can repeat the knee bends if we are not yet very skilled in the matter. However, it is recommended to replace this type of push-up with the variation in which we do push-ups with one hand. Place your unused hand behind your back with a clenched fist. Don’t twist your body when doing this kind of work. It is recommended to do 2 sets with the right arm and 2 sets with the left arm. You can start with whichever you prefer.

Ideally, for best results, you should repeat this exercise table at least 3 times a week. You’ll love the results and feel more at ease with yourself.

If you want to define your muscles…

Start using a more protein-rich diet. Increase your intake of canned tuna, chicken and rice to burn all the fat and leave your muscles as defined as possible.

Be careful, if you start with this dynamic, first talk to a nutritionist who can advise you correctly on how to carry out this type of diet. They are the typical ones used to define muscles in gyms, but only a specialist should assess if it is right for you or if it can pose a health problem in the long run.

How To Do Pilates for Weight Loss

0

Pilates is a sport that has many followers today thanks to the fact that it is a perfect activity to take care of our posture, regain flexibility and tone our muscles. There is a widespread, and totally false, belief that Pilates is a very gentle exercise that does not require any kind of preparation. This is not true at all.

How To Do Pilates For Weight Loss

Pilates is a fairly intense exercise and as such it becomes a perfect ally when it comes to losing weight. If you are interested in doing Pilates to lose weight, you probably have several doubts about it. The first of these is whether you can really do Pilates for weight loss and the answer is yes. Since Pilates is a fairly hard physical exercise, as we have just indicated, with regular practice you will discover that you will not only lose weight but also tone your entire body.

A tip that you should keep in mind when doing Pilates to lose weight is that you should contact an instructor who can help you. Of course, you can do Pilates from home with the help of articles and videos, but an instructor can help you progress faster and more effectively. This progress will result in you losing weight faster because your exercises will be more effective and efficient. Here are some of the best Pilate’s ideas for weight loss.

What do you need to do Pilates to lose weight?

  •  Comfortable clothing
  •  A yoga mat

Instructions for Doing Pilates for Weight Loss

  1. Create a routine and stick to it. You should plan your training hours and never give them up. Social commitments often make us forget about our workouts. Doing this from time to time is not a problem, but when we are not used to training, if we start to forget our workouts, we will end up quitting. You need to remember why you’re doing it. No one enjoys training as it is hard and we all end up exhausted, but the results are really worth it. Not only will you lose weight, but you will also improve your mental and emotional health.
  2. Remember to stretch. Thanks to them, you will warm up all your muscles and prepare yourself for the effort you are going to make.
  3. Focus on the exercises you’re doing and don’t cheat. It’s more worthwhile to do fewer repetitions if they’re of quality. It doesn’t matter how many repetitions you do of certain exercises. If you don’t do them correctly, it will have been like wasting your time. From the time you start practicing this sport you will have to perform few repetitions and as you gain endurance and strength you can increase the number of repetitions of each exercise.
  4. Don’t overwhelm yourself with complicated exercises. As soon as you start practicing Pilates, you will notice that there are many very complicated exercises that you will not be able to perform. You shouldn’t be overwhelmed or demotivated by them. As you continue to practice the sport, you will discover that the figures are becoming easier and easier for you and in a few months, you will be able to face the most difficult ones. Trying to do them when you’re not at the right level will only get you frustrated and injured.
  5. Remember to end each practice by dedicating several minutes to relaxing your body. This short period of rest will allow your body to adjust to rest and cool down properly. You can take advantage of these moments to meditate for a while and that this is the perfect time because your body is tired from having exercised. Relax and take several deep breaths.
  6. If you want to practice Pilates at home, here we show you how

Tips for doing Pilates for weight loss

  • When it comes to footwear, you can do whatever you see fit. There are many people who prefer to train barefoot while others prefer to do it with sneakers. What you should be looking for at all times is comfort. Try training both ways and stick with the one you feel most comfortable with.
  • Remember to maintain a healthy and balanced diet. It won’t do you any good to dedicate several hours a week to doing Pilates if you don’t follow a healthy diet. If you are used to eating badly, it will probably be difficult for you to abandon your bad habits and decide to follow a good diet. You must learn to motivate yourself by thinking that you are investing in your health and fitness. Isn’t it worth giving up excess fats and sugars for your health?

How To Do Pilates Exercises

0

Pilates is a sport that is very popular due to the many benefits it brings to the people who practice it. Doing pilates exercises will allow you to improve your fitness, lose some weight and tone all the muscles in your body. What are you waiting for to give it a try? Doing Pilates exercises will help you improve your concentration and relax more easily.

How To Do Pilates Exercises

Another great benefit of Pilates is that you can practice it anywhere, you just need a quiet space and a mat so you don’t hurt yourself when leaning on the floor. Something you should try, however, is that the space in which you have decided to practice Pilates is a quiet and quiet place since concentration is a very important part of this sport.

If you are interested in knowing how to do Pilates exercises correctly, pay close attention to the instructions below: they will be of great help to you!

What do you need to do Pilates exercises?

  •  Comfortable sportswear
  •  Yoga mat

Instructions for doing Pilates exercises

  1. Remember to stretch. Many people skip this part when training and it’s a pretty serious mistake. It’s not a good idea to start doing Pilates exercises while your body is still cold. Stretching and doing a moderate warm-up for about five minutes will be enough. 
  2. When it comes to doing Pilates exercises, there are three fundamental points that you should keep in mind at all times. The first of these is breathing. Breathing is one of the central points in the practice of Pilates. You should try to relax and get your breathing calm and deep throughout. It is very normal that during some postures or exercises you notice that it is more difficult for you to breathe. What you should try to do in those moments is relax and focus on breathing properly. Remember to breathe deeply during all exercises.
  3. The second point you should pay attention to is to keep your abdominal and lower back tense during all the exercises. Pilates was designed to enhance these two areas of our body and its exercises are only effective when our abs are tense.
  4. The last point of great importance is that of concentration. Concentration is key at all times. By being focused on the exercises we carry out, we ensure that the muscles that need to be tense are tense, while we are sure that we relax the muscles that need to rest. One of the best ways to concentrate is by trying to visualize the positions we are performing.
  5. Practice pilates at home, here we show you how to do pilates at home without having to travel, although if you can do it outdoors even better
  6. Progress little by little and don’t try to do the more complicated exercises if you don’t feel ready for them. In Pilates there are some exercises that require a lot of strength and concentration and during your first months of practice you will not be able to perform them. Don’t worry, as you gain strength and endurance you will be able to face these more complicated postures and exercises. 
  7. Don’t forget to relax for a while after you’ve practiced your exercises. In this way, your body will be able to rest from the effort to which it has been subjected and you will prepare yourself to face the rest of the day. 
  8. Finally, you should remembernot to do Pilates every day. If you want, you can train up to five days a week, but you should always keep a couple of days off to let your body rest. Despite what most people think, Pilates is not an easy or gentle exercise and your body needs to rest and relax for a couple of days.

Tips for doing pilates exercises

  • It’s a good idea to contact an instructor who can supervise your exercises. Pilates is a very technical sport and its exercises are only effective if performed correctly. It will be much easier for you to deepen your knowledge and practice of Pilates if you have a professional to help you. If for economic reasons, or of any other nature, you cannot afford an instructor, there are excellent materials on the net, such as the articles on this site, that will help you perfect your technique.

How To Do Pilates at Home

0

Pilates has been in fashion for several years now. The success of this new sport should not surprise us because it has countless benefits for our health. Pilates, like yoga, involves a series of flexibility, relaxation and strengthening exercises. It is not a risky sport in the sense that if it is done well there is no danger of suffering any type of injury.

How To Do Pilates At Home

Doing Pilates at home is an option that is gaining great followers. With the help of a personal trainer, an exercise video or a book, it is very possible to follow a complete workout. Making pillars at home is how and very cheap. We will save the money of the gymnasium while also saving the time of traveling to the gym. To do Pilates at home, you’ll need a number of elements.

As you will undoubtedly already know, you can use balls and treadmills to perform the exercises of the routines. However, these objects are not entirely necessary to do Pilates at home and to start the routines you will only need a yoga mat or mat so as not to hurt yourself when leaning on the floor.

If you want to know more about how to do Pilates at home, read on, we’ll explain it all below.

What do you need to do Pilates at home?

  •  Quiet place to train
  •  Yoga mat or mat 

Instructions for doing Pilates at home

  1. Pilates was developed by Joseph Hubertus Pilates who, inspired by yoga, tried to create a new sport focused on rehabilitation. Since its creator was inspired by yoga, Pilates today has three pillars that we detail below.
  2. Breathing is key. All the energy in our body should flow freely accompanied by breathing. You should try to breathe through your nose throughout the exercise and try to keep your breathing slow and calm. There are very complicated exercises in which your whole body will tense up. Maybe then you have a hard time breathing or you run out of breath, but you should try not to let that happen. Relax and try to breathe easy. Air should flow through your lungs at all times.
  3. Focus on your abdominal and lower back. Pilates focuses on these two parts in particular. The theory from which the whole sport emerged is that if our lower back and abs are strong and resilient, this will have an impact on a healthy and agile body. For this reason, you must maintain a perfect posture throughout your workout. Keep your back straight and don’t bend it. As for your abs, you should keep them contracted throughout the exercise. The contraction of the abs has a lot to do with breathing. As you may have noticed, when you contract this area of your body, your lungs are constricted at their base, while their upper parts widen. At this time, you will be doing all the breathing work with the upper part of your lungs.
  4. The third and final pillar, which is also of paramount importance, is concentration. When performing any of these exercises, you must be especially focused and pay close attention to concentration. To help you at this point when doing Pilates at home, you should choose a quiet and quiet room. If you want, you can help yourself with relaxing music. It’s also a good idea to do the exercises with your eyes closed, trying to visualize the body posture in your mind.
  5. Keep these three points in mind throughout your workout. Remember to keep your abs contracted, breathe slowly and perform the exercises slowly and very focused on what you are next. Here are some of the exercises you can start exercising with. 
  6. Stand up straight. Now little by little you’re going to lean forward trying to get your hands to touch your feet. It’s completely normal that during the first few weeks of training you don’t manage to touch your feet. Don’t worry, with time and continuous exercise you will be able to do it. Stay as far as you go. Do not force the elasticity of your muscles as this would be counterproductive to the health of your body. Try bending forward from the hip. Don’t bend your back. You may think that bending your back will bring you lower, but in reality, this will do you nothing more than hurt your back. Stay in this position for the time it takes you to take three deep breaths, and then slowly return to the starting position. Repeat this exercise five times.
  7. Lie on the floor on your back. Try to lift your body very slowly vertebra by vertebra without bending your back. All the work should be done by your abs and lower back. When you reach the 90-degree position, continue forward and try to touch your feet. Then return to the lying position. Repeat five times.
  8. Lying on the floor, bend your knees while keeping the soles of your feet flat on the floor. Next, try to lift your hips off the ground. As you will notice, all the effort is being made at the moment by the legs and hips. Perform the entire movement very slowly and then lower your hips again. Repeat five times.
  9. These three exercises are enough for the first day of training. If you have strength and desire left, perform more sets and repetitions.

Tips for doing Pilates at home

  • Although it is entirely possible to do Pilates at home by following the instructions we have detailed above, you should not forget the option of going to an instructor. With the help of a monitor, you will be able to progress much faster and more effectively. In addition, an instructor will be able to perfectly indicate how to perform the postures correctly.
  • Pay close attention to all the instructions you’ve read. Remember that doing Pilates incorrectly will not help you at all and you may even injure yourself.
  • Despite the common belief, Pilates is not a gentle exercise. Most people who have never practiced it think that it is a very easy and simple exercise to do. However, the reality is very different. Performing an intermediate or advanced Pilates routine by a person who has never practiced any sport will be very complicated. Even someone who is used to doing other types of sports can find problems if faced with an advanced Pilates routine, as these require a lot of flexibility and endurance. For this reason, you should not try to do something that, for the moment, is out of your reach. Don’t lose your patience. As you begin to perform the simpler exercises, you will progress and be able to tackle the more complex ones.

How To Do Hypopressive Crunches

0

If you’re a fitness or gym aficionado, you’ve probably heard about hypopressive abs for a while now. There’s a good chance you’re not sure what these new abs look like and why they’re so trendy. It is usually said that hypopressive abdominals were discovered in the eighties of the last century and that their discoverer was Dr. Marcel Caufriez during his studies and research on uro-gynecological rehabilitation. Actually, this is not accurate. Dr. Caufriez did realize the potential of these abs in this type of rehabilitation, but in reality, this type of exercise has a tradition of millennia, as it has been practiced for centuries throughout Asia, as they are a fundamental part of some types of yoga.

How To Do Hypopressive Crunches

Doing hypopressive crunches is a totally different exercise than the traditional crunches we all know. The latter are based on the training of the abs through physical stimulation through movement. However, by doing hypopressive abdominals, what we do is stimulate this area of our body through our breathing.
Doing hypopressive sit-ups offers great benefits to athletes as it allows you to expand lung capacityreduce the waist and strengthen the pelvic floor. The last two characteristics of these abs explain why they are often used for postpartum recovery. The strengthening of the pelvic floor occurs reflexively through the postures and breathing typical of this type of abdominal. If you’d like to start doing hypopressive sit-ups but aren’t sure how to do them, you’re in luck as we’ll explain it step by step below.

What do you need to do hypopressive crunches?

  •  Yoga mat
  •  Comfortable clothing
  •  A mirror

Instructions for Doing Hypopressive Crunches

  1. Once you have decided to take the step and dare to try doing hypopressive sit-ups – which I recommend since it is an exercise with many benefits – you should keep in mind that the most important thing to perform them correctly is the correct position. For this reason, all your interest should be located in the body position that you must acquire, there are many postures to do this type of sit-ups, but all of them have a series of points in common that are what make the exercise have the desired effect. For this reason, I am going to insist a lot on each of them, although I will also explain, at the end of the article, some of the most common positions.
  2. First of all, you must acquire a relaxed posture. The first pose you’re going to perform will be standing. This way you will be able to pay attention to every detail and later on, when you are able to repeat the pose with ease, you will be able to perform other more complicated postures. Stand with your feet about the same distance apart as your shoulders.
  3. Pay close attention to your pelvis. To do hypopressive crunches you will have to move it forward slightly to stimulate the pelvic floor. The best way to do this correctly is by trying to visualize your tailbone. The tailbone is the last bone in the spine. It is slightly curved and usually points downwards. You want it to point slightly forward. As you may have noticed, when trying to do this, your pelvis will have moved forward slightly. This is the position you should try to maintain all the time.
  4. Now look at your shoulders. You should try to pull them back a little but without changing the rest of your posture. Just bring them back slightly. You’ll notice how your chest moves forward as you do so and how your lung capacity widens
  5. Next, you should pay attention to your chin, which should point slightly downwards. You should aim it at your neck. Remember that the movement should be very light and at no time should you feel muscle tension.
  6. Finally, you should bring your whole body forward slightly. Normally, our body is positioned perpendicular to the ground, forming an angle of ninety degrees. You should lean forward slightly (without losing your balance).
  7. You’re now ready to start the exercise.
  8. The first key to performing these crunches is posture, as I said before. The second is breathing, as you might have guessed. What you should try to do is inhale as much air as possible through your nose. When your lungs are full, you should block the entry and exit of air (in your first attempts, to understand the movement you can help yourself by covering your nose) and pretend to breathe. By doing this while your airways are closed, you will notice how all the air inside you rises to the highest area of your lungs. That is the desired movement that is going to help us so much. When that elevation occurs, your rib cage expands its capacity. On the other hand, the lower part of your lungs contracts and retracts inwards. As you may have noticed, this area coincides with your abs.
  9. Look at yourself in a mirror. This will help you understand the movement. Your abs should be contracted inwards and you will notice that the circumference of your waist has been reduced. However, the rib cage and chest are fully expanded and filled with air.
  10. You want to keep the air trapped for as long as you can. The more the merrier. When you need to breathe, expel all the air through your mouth and relax your entire posture.
  11. Perform several repetitions.
  12. This is the most common pose, but there are others that we detail below.
  13. On all fours: resting on the ground with our hands and knees. Remember to bring your pelvis forward, pull your shoulders back, and lower your chin. These three points should be repeated in all postures
  14. Face up: with your knees bent and your feet flat on the floor. We will raise our arms towards the ceiling and place our palms at a ninety-degree angle parallel to the ceiling. You should think of yourself as exerting force against something, as if you were trying to lift or hold the ceiling.
  15. On your knees: with your arms extended at a ninety-degree angle and your hands raised with your hands parallel to the wall. Imagine you’re pushing the wall. Also, remember to lean forward slightly like when you did the first standing pose.
  16. There are many more postures. You can do them as you progress in your workouts. Always remember to keep the three fundamental position points and lean forward.

Tips for doing hypopressive crunches

  • During the first few days when doing hypopressive sit-ups, it is quite common for you to feel dizzy. This is due to the breathing effort you are exerting. You shouldn’t panic as it’s a very normal thing to do. You just need to take a little break.

How To Do Dumbbell Exercises

0

Doing exercises with dumbbells is always good as it allows us to improve our physical fitness. Despite the general opinion that weight training is only good for muscle development, we find that depending on what exercises we do, we can do cardiovascular exercises and lose excess weight, while toning our muscles without developing them too much.

How To Do Dumbbell Exercises

One of the most important points if we want to tone and not develop our muscles when doing exercises with dumbbells is to calculate very well the weight we are going to use. While most men want to increase their arm muscle mass, most women prefer to have slim, modified arms, but without gaining muscle. This does not mean, in any way, that we have to do different dumbbell exercises. The dumbbell exercises we propose in this article are exactly the same for both men and women. All you have to do is choose the weight of them depending on the goal you want to achieve.

If you want to do exercises with dumbbells in order to keep your arms beautiful and toned, you should use dumbbells weighing less than five kilos each. If, on the other hand, you want to do exercises with dumbbells to increase your muscles, you should use heavier dumbbells. On the other hand, it should be clarified that if you have never trained with additional weight, you cannot start using, for example, five-kilogram dumbbells suddenly. You should start very slowly with light dumbbells and increase their weight progressively over the weeks. This way you allow your arms to get used to the new effort. If you want to know more about how to do dumbbell exercises, pay close attention to what comes next.

What do you need to do dumbbell exercises?

Instructions for Doing Dumbbell Exercises

  1. Jumping jacks: this type of exercise is one of the most famous around the world. We’ve all done it at some point when we were little and did gymnastics at school. We also often link it to military training. The popularity of this exercise is undoubtedly due to its good results. If we perform sets of this exercise with dumbbells, we will be doing very intense cardiovascular exercise that will allow us to lose weight. In addition, by using dumbbells we will be toning our arms and legs since the effort of these to jump will be greater as we have to move more weight.
  2. Squats: Squats are another one of the best exercises possible. They help us tone our legs and buttocks. If you want to improve the effectiveness of this exercise even more, you just have to use dumbbells. Let your arms hang down and hold the dumbbells. Every time you perform a squat, try to bring your dumbbells all the way to the floor. This way you make sure that the squat is much deeper. In addition, the effort that your legs will have to make to propel your body upwards will be much greater. From the one you’re ascending, bend your arms toward your shoulders and bring the dumbbells up.
  3. Lying on your back, bend your arms at chest height and extend them toward the ceiling. This way you’ll be working your arms and chest. This is a great toning exercise if you use a moderate weight or a muscle-building exercise if you use a heavier weight. 
  4. Fists: another of the best ways to improve the muscles of our arms is to perform a series of punches. In this exercise you must be very careful and use a fairly light weight. Ideally, you should do quick sets of this exercise. Therefore, it will be much more beneficial for you to use a lighter weight. By doing this exercise at a fast pace, you will not only be improving your muscles, but you will also be performing cardiovascular exercise.

Tips for Doing Dumbbell Exercises

  • Remember that by using weights in your workouts it is much easier to injure yourself. For this reason, you should be careful about the weight you use. Never lift too much weight if you are alone as you could have an accident. Remember that you are doing all these exercises to improve your health and fitness.
  • If you want to enjoy sports and exercises with dumbbells but you can’t afford the expense that they entail, here is an article that will explain how to do sports without spending money that will surely be of interest to you